

Have you ever tasted a dessert that feels like a warm hug? That’s exactly what this Russian Honey Cake (Medovik) does! I still remember the first time I made it — the sweet aroma of burnt honey, buttery cake layers, and creamy frosting filled my kitchen with happiness.
It’s a dessert that looks elegant but feels homemade and cozy.
If you love cakes that balance sweetness and sophistication, you’ll absolutely adore this one. I’ve spent time perfecting this recipe so you can recreate that melt-in-your-mouth magic at home.
Don’t wait! Save this pin right now so you have this recipe when you need a showstopper dessert. Plus, check out the Notes section where I break down the right equipment to make your baking process seamless.

Why You Will Fall in Love with Every Layer
You are going to crave this cake for its complex flavor. It’s the perfect balance of sweet, tangy, and cozy-spiced. The burnt honey provides a deep, almost caramel richness that elevates it far beyond a simple honey cake.
Best of all, it’s a wonderful make-ahead dessert, allowing you to finish the hard work a day before serving—a true baker’s dream!
What Makes This Cake So Special?
The Russian Honey Cake is a gorgeous, many-layered dessert. Our version features eight thin, honey-flavored cake layers, baked until they are light and crisp, almost like thick cookies.
These layers are sandwiched between a luxurious, slightly tangy frosting made from heavy whipping cream and sour cream, spiked with burnt honey. The magic is the resting time; as the cake chills, the frosting is absorbed by the layers, turning them incredibly moist and tender.
A Story of Sweet History and Royalty
The Medovik cake is believed to have been created in the 19th century in the Russian Empire. Legend says it was invented by a young chef for Empress Elizabeth Alexeievna, wife of Alexander I, who famously disliked honey.
The chef skillfully masked the flavor with other ingredients, creating a dessert she adored. Today, it remains a beloved staple across Russia and Eastern Europe, traditionally served for celebrations and holidays.
Indulgent Russian Honey Cake: Discover a Flavorful Delight!
Description
The success of the Russian Honey Cake lies in the thin, pliable layers and the luxurious cream.
This recipe introduces the richness of burnt honey twice: once in the cake layers and again in the frosting, creating a cohesive, deep flavor profile.
The Amazing Benefits You Get
- Deep Flavor: The caramelized honey creates a unique, toffee-like depth.
- Velvety Texture: The extended chill time guarantees a tender, melt-in-your-mouth crumb.
- Showstopper Dessert: The numerous thin layers make this cake visually stunning and impressive.
This detailed process involves three main phases: The Burnt Honey, which provides the depth of flavor; The Cake Layers, where you create and bake eight thin layers; and The Assembly, where you whip the frosting, stack, crumb coat, and chill the cake for at least 8 hours.
Ingredients
For Cake Layers:
For Frosting:
Instructions
-
Start by pouring ¾ cup wildflower honey into a deep saucepan. Heat it on medium until it turns a shade darker and smells caramel-like — this should take about 10 minutes. Turn off the heat and carefully whisk in 3 tablespoons of cold water. This will create that signature burnt honey flavor.

-
In a large metal bowl over low heat, add 1 cup sugar, 14 tablespoons butter, ¾ cup honey, and ¼ cup of your burnt honey (save the rest for frosting). Allow the butter to melt slowly for about 5–7 minutes. Stir gently.

-
In a separate small bowl, mix 2 ½ teaspoons baking soda, 1 teaspoon cinnamon, and ¾ teaspoon salt. Once the butter mixture is warm, whisk in 6 eggs, one at a time. Then add your dry baking mix. Keep whisking until smooth and slightly foamy.

-
Sift 3 ¾ cups flour in batches into the warm mixture. Stir after each addition until you get a smooth, sticky, and spreadable batter.
-
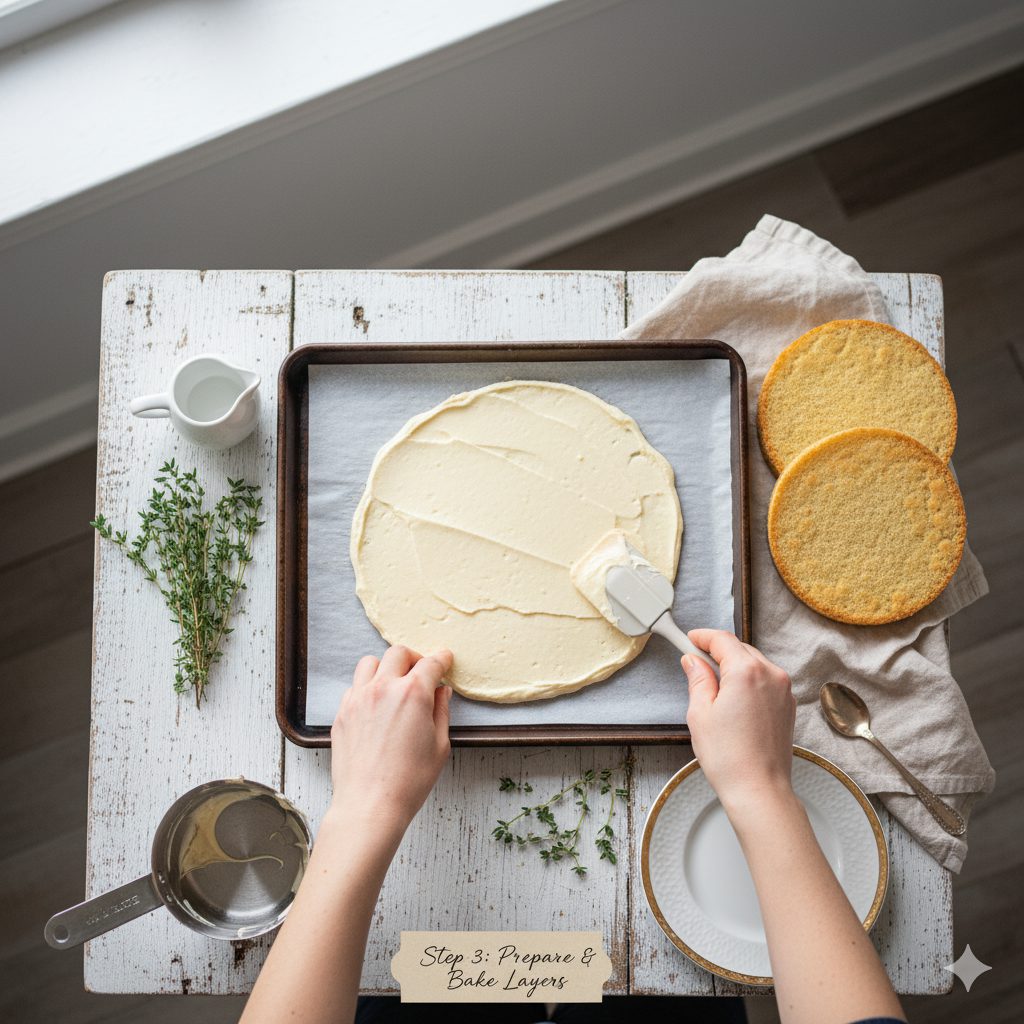
Preheat the oven to 375°F (190°C). Line a baking sheet with a silicone mat. Spread about ½ cup batter into an 8-inch circle using an offset spatula. Tap gently to remove air bubbles. Bake each layer for 6–7 minutes, until lightly browned.
-
Let each layer cool completely on parchment rounds. Repeat until you have 8 layers. Trim the edges for evenness and save the scraps — you’ll use them for crumbs.
-
Bake the scraps for another 7–10 minutes until golden. Once cool, crush them finely using a rolling pin or blender. These crumbs will coat your cake later.
-
Chill your bowl and whisk. Beat 4 cups heavy cream until soft peaks form. Add ¾ cup sour cream and the remaining burnt honey. Whisk again until stiff and fluffy.
-
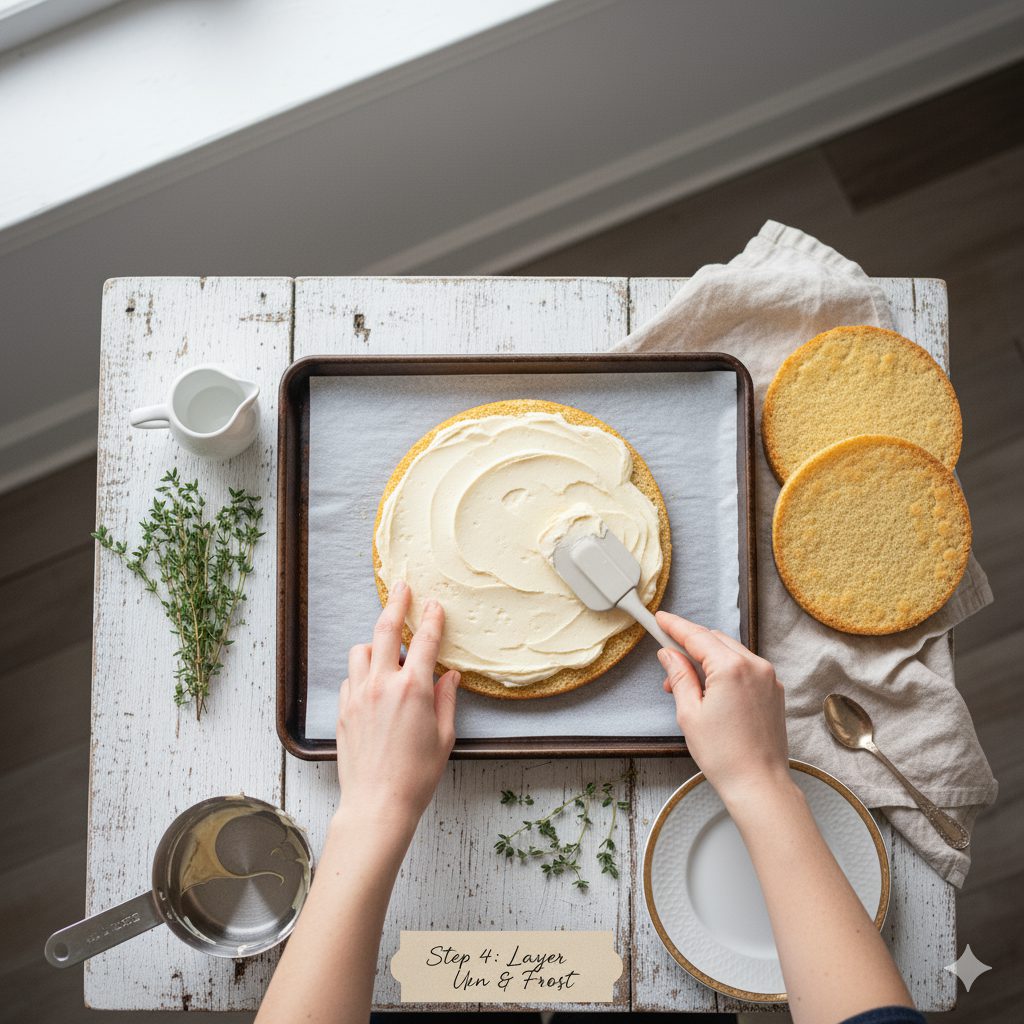
Place one cake layer on a plate. Spread a generous cup of frosting evenly on top. Repeat, layering and frosting each one. Keep the smooth side up for the top layer.
-
Frost the top and sides completely. Coat the cake with the honey-scented crumbs. Wrap in plastic and refrigerate for at least 8 hours or overnight. Slice and serve chilled — it’s perfection!

Nutrition Facts
Servings 6
- Amount Per Serving
- Calories 520kcal
- % Daily Value *
- Total Fat 34g53%
- Total Carbohydrate 48g16%
- Sugars 34g
- Protein 6g12%
* Percent Daily Values are based on a 2,000 calorie diet. Your daily value may be higher or lower depending on your calorie needs.
Note
Equipment Checklist:
- Large mixing bowl
- Whisk and spatula
- Deep saucepan
- Baking sheet
- Parchment paper rounds
- Rolling pin
- Electric mixer or hand whisk
My Personal Notes: Secrets to an Indulgent Honey Cake
You’ve come this far! These are my personal, tested tips that will turn your baking efforts into a masterpiece—pay close attention to the details!
Tips for Making It Easy
- Prep Templates: To save time and get perfect layers, use a marker to trace your 8 or 9-inch circle onto the back of your silicone mat or parchment paper before you start baking. You can easily use the lines as guides!
- Roll Warm Dough: The cake batter is essentially a soft dough, and it's much easier to spread when it's still warm. Work quickly when spreading each layer, as the dough stiffens as it cools.
- Chill the Scraps: When you are ready to trim the edges, chill the baked layers for about 15 minutes after they've cooled. They become firmer and much easier to trim neatly with the pizza wheel.
Family-Friendly Strategy
While the complexity makes this more of a baker's treat, the crumb preparation is a fantastic, kid-friendly step. Once the scraps are cool and in the bag, let the children use the rolling pin to crush them into fine crumbs. It’s a great way to include them!
Common Mistakes to Avoid
- Burning the Honey: Watch that honey like a hawk in Step 1! The difference between caramelized and burned is seconds. If it smokes or smells acrid, start over. That deep, caramel aroma is what you want.
- Hot Batter and Eggs: When whisking in the eggs (Step 5), the butter mixture must be very warm, but not so hot that it scrambles the eggs. If it feels too hot, pull it off the heat for 30 seconds before adding the eggs slowly while whisking vigorously.
- Serving Too Soon: Do not skip the 8-hour chill time! If you cut the cake early, the layers will be crisp, dry, and fall apart. The cake must sit overnight to absorb the moisture from the sour cream frosting.
How to Store It
- Uncut Cake: The whole cake, covered tightly with plastic wrap, can be stored in the refrigerator for up to 5 days. It actually tastes best on days 2 and 3.
- Freezing: You can freeze the unfrosted cake layers for up to 3 months. Thaw them completely before frosting. I don't recommend freezing the assembled cake.
Ways to Make It More Flavorful
- Spice Boost: Add a pinch of ground cloves or cardamom along with the cinnamon for a warmer, spicier note.
- Zest: Grate the zest of half a lemon into the frosting to enhance the tanginess of the sour cream.
- Liquor Brush: Before frosting, lightly brush each cake layer with a few drops of honey-flavored liqueur or spiced rum for deeper flavor saturation.
Tips for Making the Recipe More Healthy
- Sugar Reduction: You can often reduce the white sugar in the cake layers by 1/4 cup without affecting the structure, relying more on the honey for sweetness.
- Sour Cream Substitution: Substitute some or all of the heavy whipping cream in the frosting with full-fat Greek yogurt for a massive protein boost and added tang (though it will require a stabilizer like cream cheese for stiff peaks).
Delicious Variations
- Nutty Medovik: After frosting the sides, use a mix of the cake crumbs and finely chopped walnuts or pecans for a crunchy coating.
- Chocolate Honey Cake: Add 1/4 cup of unsweetened cocoa powder to the flour mixture for a subtle chocolate-honey flavor.
Best Matches for Servings
This cake is incredibly rich and dense with flavor, making it perfect with simple accompaniments:
- A simple cup of strong black tea (a Russian tradition!)
- A classic latte or cappuccino
- A side of fresh berries (like raspberries or strawberries) to cut the richness.
- A small scoop of vanilla bean ice cream (if you're feeling extra indulgent!).
Conclusion: Enjoy Your Royal Treat!
You have successfully navigated the wonderful world of layered baking and created an Indulgent Russian Honey Cake!
This dessert is a true labor of love, but the depth of flavor from the burnt honey and the magical, cloud-like texture that develops overnight make it a completely rewarding effort.
I hope you felt the satisfaction of creating something so beautiful and delicious from scratch. Now, be patient, let it rest, and get ready for the best slice of cake you’ve ever had!
Pin this recipe to share with your friends and followers.