

When it comes to spooky season treats, there’s nothing quite as fun (or as delicious) as Halloween Oreo Balls. These bite-sized delights are the ultimate no-bake dessert—rich, chocolatey, and dressed up in festive Halloween flair. Imagine creamy crushed Oreos blended with velvety cream cheese, rolled into little spheres of joy, then dipped in silky melted chocolate.
Now picture them decorated with orange drizzle, candy eyeballs, or spooky sprinkles that instantly bring the Halloween vibe to your dessert table. Whether you’re hosting a haunted house party, sending treats to school, or just looking for a fun kitchen activity with the kids, these Oreo balls are guaranteed to disappear fast.
Instead of just scrolling, wave your magic wand and save this pin for recipe before your cauldron of ideas runs empty—you’ll thank yourself when the Halloween cravings strike!
What makes these treats even more spellbinding is how simple they are to make. No oven, no fuss, just pure chocolate-and-cookie happiness. They can be prepped ahead, stored in the fridge, and pulled out whenever you need a festive sweet bite. Fun, foolproof, and frightfully delicious—these Halloween Oreo Balls are bound to become a holiday tradition in your home.
Halloween Oreo Balls : Cute, Easy, and Spooky Treats for Kids and Parties
Description
Halloween Oreo Balls are spooky yet delightful bite-sized treats that combine crushed Oreo cookies with creamy cream cheese, coated in a smooth chocolate shell.
Perfect for Halloween parties, these no-bake goodies can be decorated with candy eyes, orange drizzle, or festive sprinkles to resemble pumpkins, ghosts, or creepy monsters.
Their rich, fudgy texture pairs perfectly with the sweet crunch of the chocolate coating, making them irresistible for kids and adults alike.
Quick to prepare and fun to decorate, Halloween Oreo Balls are a creative way to add a festive and frightfully delicious touch to your dessert table.
Ingredients
For Halloween decorations (optional but fun):
Instructions
-
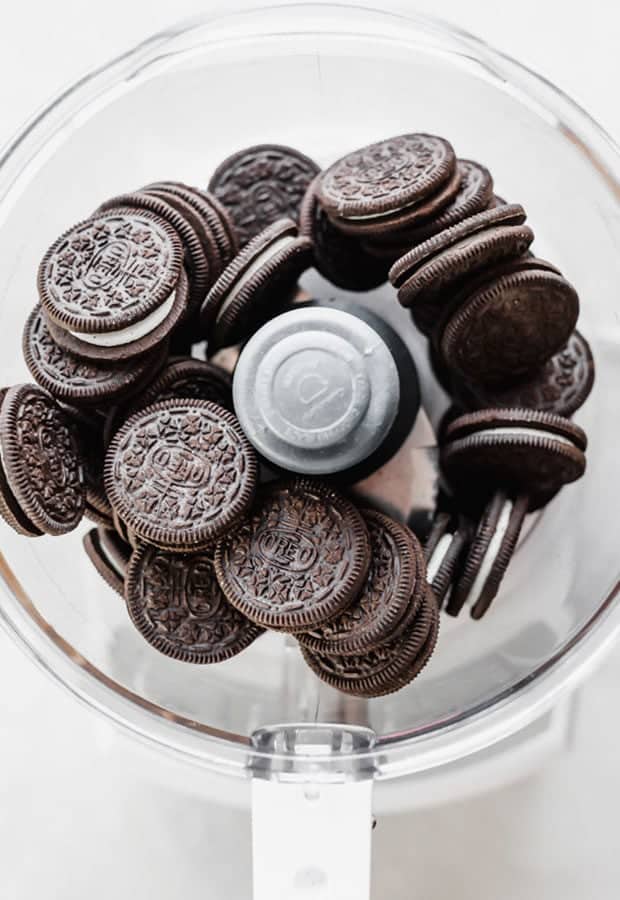
Place the Oreo cookies in a food processor and pulse until you get fine crumbs. If you don’t have a food processor, place the cookies in a zip-top bag and crush them with a rolling pin. You want the crumbs to be as fine as possible so they blend well with the cream cheese.
-
In a large mixing bowl, combine the Oreo crumbs with softened cream cheese. Use a spatula, spoon, or your hands to mix until fully combined and smooth. The mixture should hold together when pressed.
-
Scoop about 1 tablespoon of the mixture and roll it into a ball using your palms. Place each ball onto a baking sheet lined with parchment paper. Continue until all the mixture is used—you should get about 30–36 balls depending on size.
-
Refrigerate for at least 30 minutes, or place them in the freezer for 15 minutes. This step helps them firm up and makes dipping much easier.
-
Melt your chocolate chips or candy melts in the microwave in 30-second intervals, stirring between each, until smooth. You can divide the batch if you want different colors (white, orange, purple, etc.) for Halloween variety.
-
Using a fork or dipping tool, dip each chilled Oreo ball into the melted chocolate until fully coated. Tap gently to remove excess chocolate and return to the parchment-lined sheet. Work in batches so the chocolate doesn’t harden too quickly.
-
Here’s where you can get creative:
-
Ghosts: Dip in white chocolate, then add candy eyes and draw a spooky mouth with edible gel.
-
Pumpkins: Use orange candy melts, then draw pumpkin ridges with a toothpick and top with a green sprinkle or pretzel stick stem.
-
Mummies: Dip in white chocolate, let dry, then drizzle more white chocolate in thin lines across the ball. Add candy eyes peeking through.
-
Monster Eyes: Coat in green or purple melts, then press a large candy eye in the center and surround with black detailing.
-
-
Allow the Oreo balls to set at room temperature until the coating hardens, or refrigerate for about 10–15 minutes to speed up the process.

Nutrition Facts
Servings 20
- Amount Per Serving
- Calories 130kcal
- % Daily Value *
- Total Fat 7g11%
- Saturated Fat 4g20%
- Sodium 70mg3%
- Total Carbohydrate 16g6%
- Dietary Fiber 0.5g2%
- Sugars 12g
- Protein 2g4%
* Percent Daily Values are based on a 2,000 calorie diet. Your daily value may be higher or lower depending on your calorie needs.
Note
Halloween Oreo Balls: Tips, Tricks & Serving Ideas
Halloween is the perfect time to bring spooky fun into the kitchen, and Halloween Oreo Balls are one of the easiest yet most impressive treats you can make.
These bite-sized delights are rich, creamy, and endlessly customizable. Made with crushed Oreos, cream cheese, and a chocolate coating, they’re simple enough for beginners but versatile enough to be dressed up in hauntingly creative ways.
Whether you’re planning a party, preparing trick-or-treat snacks, or just looking for something festive to whip up with the kids, Oreo Balls are a no-fail Halloween favorite.
1. Start with the Base
The classic Oreo Ball recipe calls for just two main ingredients: crushed Oreos and cream cheese. Pulse the cookies into fine crumbs using a food processor. Then mix them thoroughly with softened cream cheese until a dough-like texture forms. This base can be rolled into bite-sized balls that will later be coated in melted chocolate or candy melts.
Pro Tip: Use regular Oreos, not Double Stuf. The extra cream filling can make the mixture too soft and harder to work with. If the mixture feels sticky, pop it into the fridge for 10–15 minutes before rolling.
2. Coating Magic
The coating is where Oreo Balls transform from simple truffles into festive Halloween creations. Candy melts are the easiest option because they come in fun Halloween shades—orange, purple, green, and black. Melt them gently in the microwave in 30-second bursts, stirring between each round until smooth.
Dip each chilled Oreo ball into the melted coating using a fork or a dipping tool. Tap off excess chocolate before setting them on parchment paper to harden.
Trick: Add a teaspoon of coconut oil or shortening to your melted candy to make the coating smoother and easier to work with.
3. Spooky Decorating Ideas
Here’s where the real Halloween fun comes in. Once dipped, you can decorate your Oreo Balls with candies, sprinkles, and icing to match the spooky theme.
- Monster Eyes: Stick candy eyeballs on while the coating is still wet. Use green, purple, or orange candy melts for the base.
- Pumpkins: Dip in orange candy melts, then pipe green frosting stems on top. Add jack-o’-lantern faces with black decorating gel.
- Mummies: Coat in white candy melts, then drizzle extra white chocolate over the top in zigzag “bandages.” Add candy eyes for effect.
- Spiders: Attach pretzel stick legs and mini chocolate chip eyes.
- Witches’ Cauldrons: Use black candy melts, then decorate the top with green icing “bubbling potion” and sprinkle with mini candy bits.
4. Serving Tricks
Halloween Oreo Balls are incredibly versatile when it comes to presentation. Instead of just setting them on a plate, you can serve them in creative and thematic ways to wow your guests.
- Cupcake Liners: Place each ball in a mini Halloween-themed cupcake liner for a neat, grab-and-go option.
- Halloween Platter: Arrange them on a tray decorated with candy corn, gummy worms, or fake cobwebs for a spooky display.
- Oreo Ball Pops: Stick lollipop sticks in before chilling and serve as cake pops. Wrap individually in plastic with orange or black ribbon for trick-or-treat favors.
- Themed Sections: Divide into groups—pumpkins, mummies, monsters—and display them as a “Haunted Dessert Table.”
5. Make-Ahead & Storage
One of the best parts about Oreo Balls is that they can be made ahead of time. Store them in an airtight container in the fridge for up to a week, or freeze for up to two months. If freezing, let them thaw in the fridge overnight before serving.
Tip: If you’re hosting a party, make them the night before. They actually taste better after sitting a day, as the flavors meld together.
6. Portion & Servings
A standard recipe using one 14-ounce package of Oreos and one 8-ounce block of cream cheese yields about 36 Oreo Balls. Since they’re rich, most people are satisfied with one or two, making this batch perfect for serving 12–18 people. For larger parties, simply double the recipe.
Serving Trick: Pair Oreo Balls with themed drinks like “witch’s brew punch” or pumpkin spice lattes for a full Halloween experience.
Tips for Perfect Halloween Oreo Balls
- Don’t skip chilling: Warm Oreo balls will fall apart in the melted chocolate.
- Use candy melts: They’re easier to color and often smoother for coating than chocolate.
- Work quickly: The chocolate hardens fast, so have decorations ready.
- Store properly: Keep in an airtight container in the fridge for up to 2 weeks. They can also be frozen for up to 2 months.
Serving Ideas
Arrange your Halloween Oreo Balls on a festive tray lined with fake spider webs, plastic spiders, or Halloween-themed cupcake liners. Serve them as a party dessert, package them in small bags as edible favors, or even use them as edible “toppers” for cupcakes. Their bite-sized nature makes them perfect for kids’ hands and adult snacking alike.
Why Everyone Will Love Them
Halloween Oreo Balls strike the perfect balance between spooky and sweet. They’re chocolatey, creamy, and melt-in-your-mouth delicious, while also doubling as edible decorations.
Plus, the simplicity of the recipe means you don’t need to be a professional baker to make them look amazing. With a little imagination and some festive sprinkles or candy eyes, you’ll have a batch of Halloween-ready treats that will disappear in no time.
Final Thoughts
This Halloween, let your creativity shine in the kitchen with these Halloween Oreo Balls. They’re fun to make, impressive to serve, and irresistible to eat. Whether you craft a tray full of ghosts, pumpkins, monsters, or mummies, these no-bake delights will have everyone howling with delight. With minimal effort and maximum fun, this recipe might just become your go-to Halloween tradition.
Halloween Oreo Balls are proof that festive treats don’t need to be complicated. With a simple base and endless decorating possibilities, you can create monsters, pumpkins, mummies, or anything your imagination conjures.
By following these tips and tricks—keeping the mixture firm, thinning your coating, and getting creative with decorations—you’ll have a Halloween dessert that’s as fun to make as it is to eat.
Best of all, they’re easy to serve, make ahead, and share with a crowd. These little bites of spooky sweetness are bound to disappear fast at any Halloween gathering!
Pin this recipe to share with your friends and followers.
Frequently Asked Questions
What are Halloween Oreo Balls?
Halloween Oreo Balls are a festive, bite-sized treat made with crushed Oreo cookies mixed with cream cheese, rolled into balls, and coated in melted chocolate or candy melts. For a spooky twist, they’re decorated with Halloween sprinkles, candy eyeballs, or drizzles of orange and black chocolate. They’re creamy, rich, and perfect for parties or trick-or-treat gatherings.
Do I need to bake them?
No baking is required, which makes Halloween Oreo Balls one of the easiest desserts you can prepare. The mixture is chilled, rolled, dipped in chocolate, and decorated—no oven needed. This makes them a fun project to do with kids or when you want a quick dessert without turning on the oven.
How far in advance can I make Oreo Balls?
You can prepare them up to 3 days in advance and store them in the refrigerator. Keep them in an airtight container so they stay fresh and creamy. If you’d like to make them earlier, the undipped Oreo balls can be frozen for up to 2 months. When ready to serve, simply thaw, dip, and decorate. This makes them a stress-free option for busy holiday schedules.
How can I decorate them for Halloween?
There are countless fun options! Dip the Oreo Balls in orange, black, or white candy melts, then top with festive sprinkles. Add candy eyes to create monsters, drizzle with contrasting chocolate to look like spider webs, or shape them into pumpkins before dipping. You can even insert lollipop sticks and turn them into Oreo “cake pops” for easier serving.