
The Church Window Cookie is an undisputed star of the holiday treat plate, a dazzling confection that captures the festive spirit like no other. More than just a simple no-bake sweet, it’s a nostalgic masterpiece built from melted chocolate, gooey marshmallows, and crunchy walnuts, all rolled together into a shimmering log.
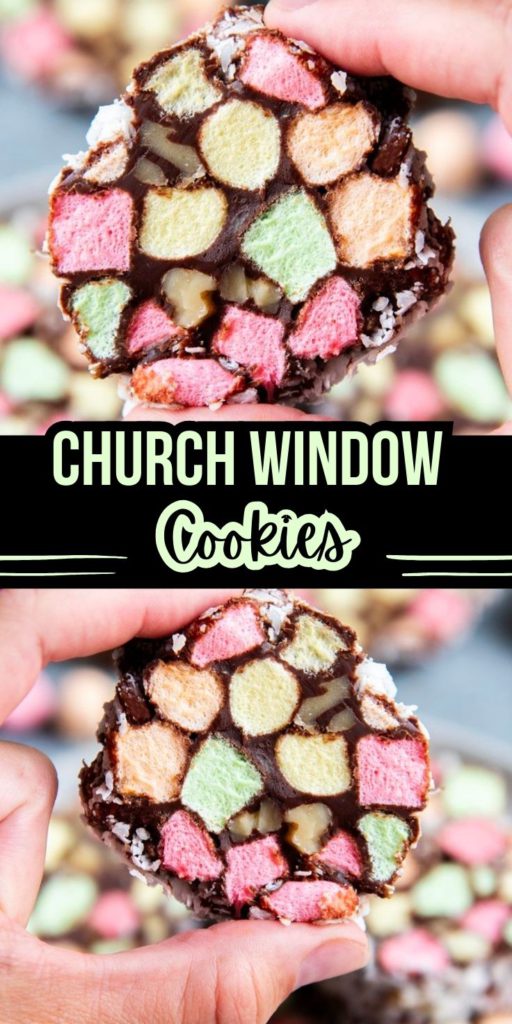
This treat is called a “Church Window” because when you slice it, the brightly colored marshmallows inside look exactly like stained glass panels illuminated by light. You absolutely must save this pin for the recipe, because this cookie offers maximum visual impact with minimal effort, requiring no oven time at all.
The magic lies in its simplicity and striking appearance. The soft, chewy texture of the tinted marshmallows contrasts perfectly with the rich, dense chocolate coating and the satisfying crunch of nuts. It’s an edible work of art that’s easy enough for children to help assemble, yet elegant enough to grace any holiday party.
These beautiful cookies are traditionally prepared ahead of time, chilled, and sliced just before serving, making them the ultimate stress-free addition to your seasonal baking repertoire.
Church Window Cookies
Description
Church Window Cookies are a captivating, no-bake confection that transforms simple ingredients into an extraordinary visual and textural experience.
This dessert earns its evocative name from the way brilliant, jewel-toned miniature marshmallows are suspended within a rich, dark chocolate matrix, creating the beautiful, multi-hued look of stained-glass.
The process is remarkably easy: melted chocolate and butter are blended with a touch of vanilla, then folded around an abundance of bright marshmallows and crunchy walnuts or pecans. Once chilled and sliced, each disk reveals a unique, shimmering pattern.
These cookies are a staple of festive holiday baking, cherished for their nostalgic charm and ease of preparation—no oven required!
They offer a delightful contrast between the creamy, deep flavor of the chocolate fudge base and the sweet, chewy lightness of the vibrant marshmallows.
They hold their shape beautifully and are a perfect candidate for holiday cookie plates, bringing both color and irresistible flavor to any occasion.
Ingredients
Instructions
-
Melt and Prepare the Chocolate Base
In a medium, sturdy saucepan, combine the butter, granulated sugar, milk, and salt. Set the pan over medium heat. Continue stirring constantly until the butter is liquefied and the sugar particles have fully dissolved into the liquid. Once smooth, add the cocoa powder and whisk it in until the mixture is uniform and dark. Bring the base to a low, rolling boil and let it cook for precisely one minute. Lift the saucepan off the heat source right away after the cooking time is complete.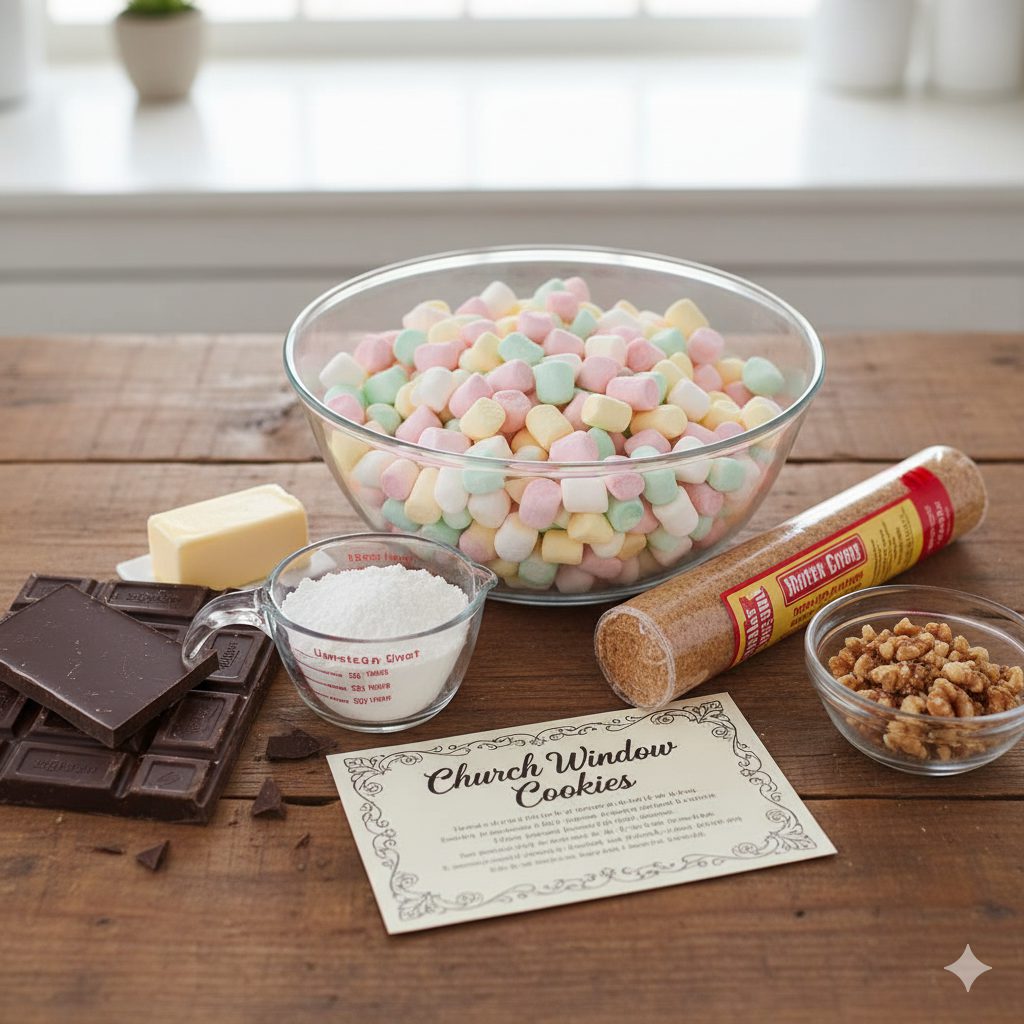
-
Cool and Introduce Flavor
Take the pan off the heat and let the mixture sit undisturbed for about three to five minutes. This rest period prevents the marshmallows from turning into liquid when they are added. Stir in the vanilla extract. The fudge base should still be quite warm. -
Integrate the "Stained Glass" Elements
Pour the mini marshmallows and chopped nuts directly into the warm chocolate base. Using a spacious wooden spoon or flexible spatula, incorporate the ingredients with gentle, deliberate movements until all the marshmallows and nuts are covered by the chocolate. The overall consistency will be thick, dense, and visibly lumpy due to the marshmallows and nuts.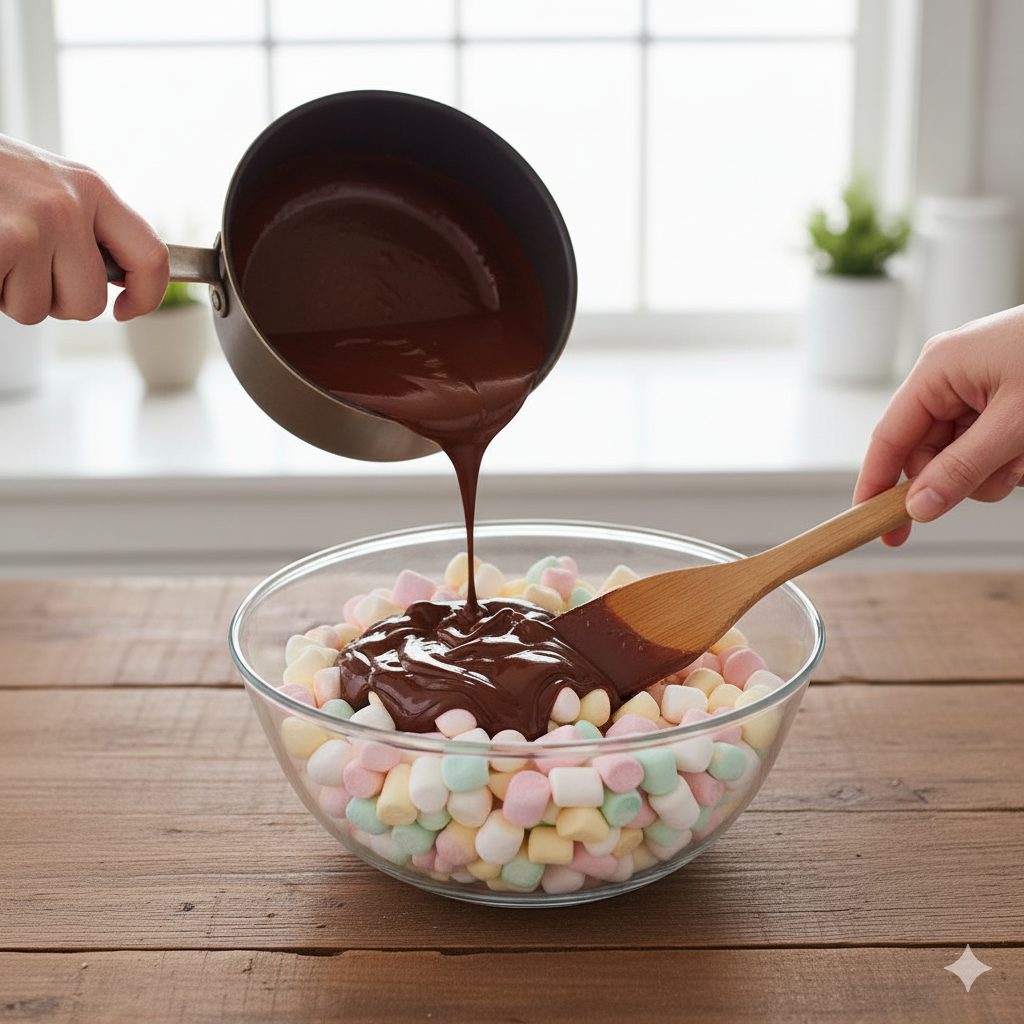
-
Prepare the Surface and Shape the Logs
If you plan to use the coconut coating, spread the flakes evenly across two large sheets of parchment or wax paper. Divide the marshmallow-chocolate mixture into two equal portions. Place each portion onto one of the prepared sheets. Using the paper to guide you, rapidly form each section into a straight, firm log, roughly 1.5 to 2 inches thick.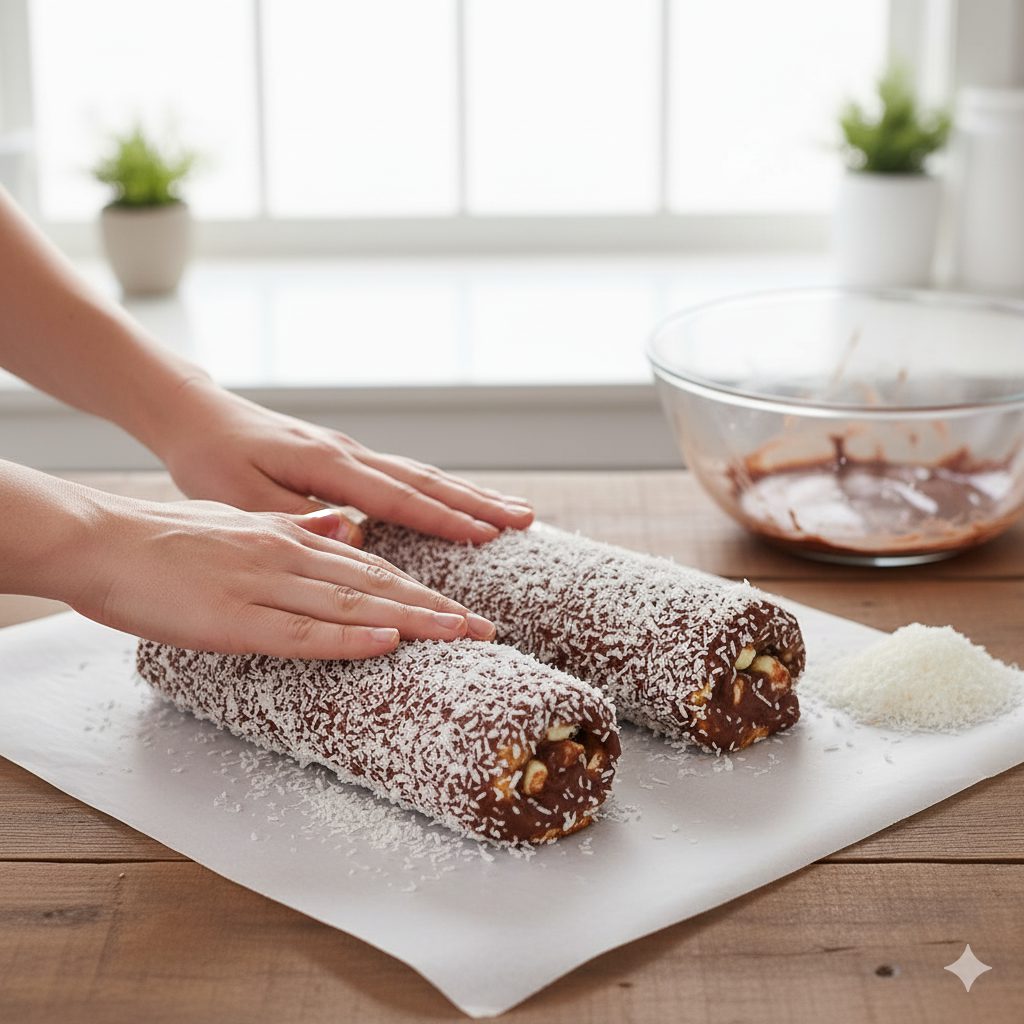
-
Wrap and Initiate Chilling
Roll the logs tightly in the paper, creating a snug cylinder. Twist the ends of the paper to seal and lock in the shape. Relocate the wrapped logs to the refrigerator. Give them ample time to harden completely, at least four hours, but chilling them overnight is the best way to ensure perfect slices. -
Slice and Present
Once the logs are rock-solid, take them out of the refrigerator and remove the wrapping. Use a sharp, smooth knife to cut the cylinder into 1/2-inch thick rounds. The vibrant interior colors are now revealed, creating the gorgeous stained-glass appearance. Serve the cookies chilled; any leftovers should be kept in an airtight container in the refrigerator to maintain their shape and texture.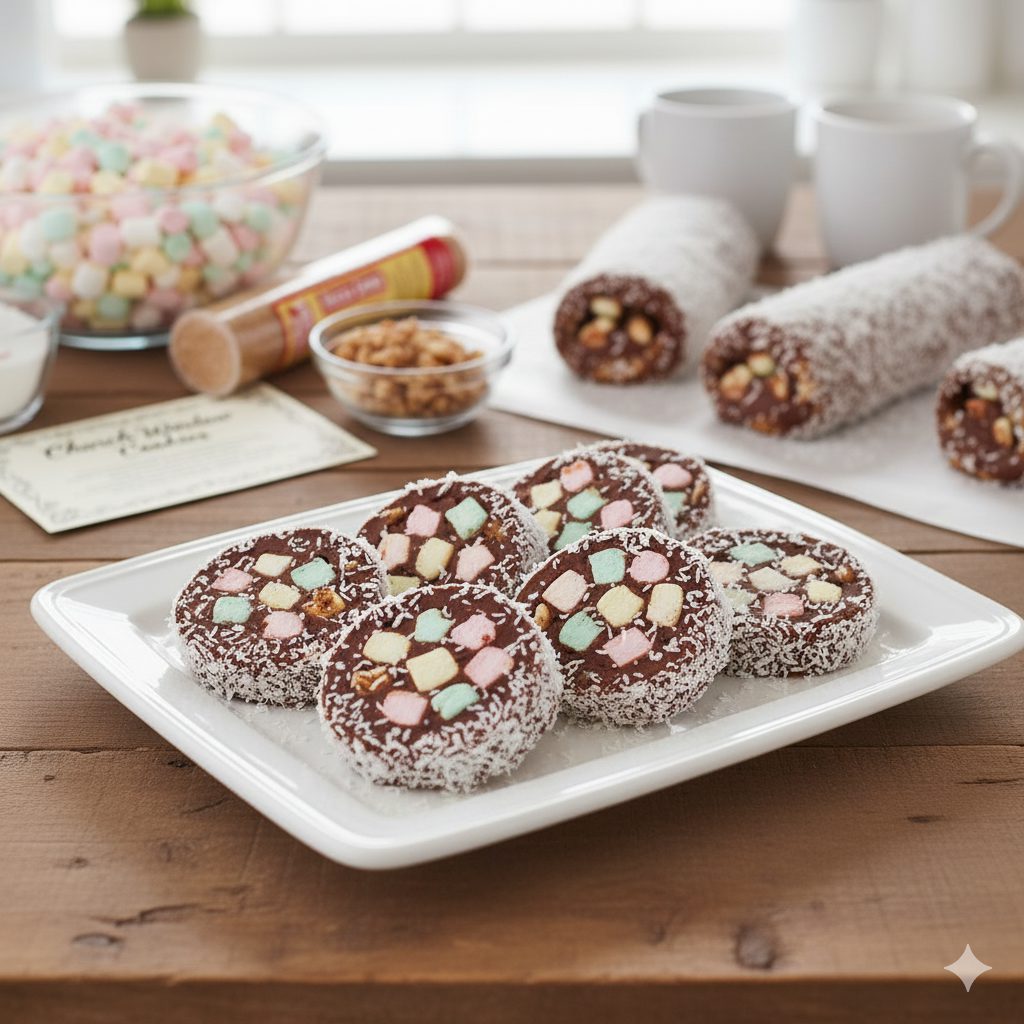
Nutrition Facts
Servings 24
- Amount Per Serving
- Calories 200kcal
- % Daily Value *
- Total Fat 12g19%
- Saturated Fat 7g35%
- Cholesterol 15mg5%
- Sodium 50mg3%
- Total Carbohydrate 25g9%
- Dietary Fiber 2g8%
- Sugars 20g
- Protein 3g6%
* Percent Daily Values are based on a 2,000 calorie diet. Your daily value may be higher or lower depending on your calorie needs.
Note
Tips and Tricks for Perfection
1. The Crucial Butter-to-Chocolate Ratio
The base of the Church Window Cookie is melted chocolate and butter, which sets up the final texture.
- Tip: Use Quality Butter and Chocolate: Since there is no baking involved, the flavor of your ingredients is front and center. Use real butter (not margarine) and a good-quality semi-sweet chocolate chip or baking chocolate for the richest, deepest flavor.
- Trick: Temper the Mixture: After melting the butter and chocolate, let the mixture cool slightly before adding the marshmallows. If the mixture is too hot, it will melt the marshmallows, resulting in a muddy, indistinct color rather than clear "windows." The perfect temperature allows the chocolate to coat the marshmallows without dissolving them. It should be warm enough to stir easily, but cool enough that you can touch the mixture with your finger without discomfort.
2. Marshmallow Management is Key
The marshmallows are the "glass" of the window, so their handling is paramount.
- Tip: Use Fresh Mini-Marshmallows: Always use fresh, soft mini-marshmallows. Stale, firm marshmallows won't distribute well and may leave gaps when sliced.
- Trick: Gentle and Quick Folding: Once the slightly cooled chocolate mixture is poured over the marshmallows, fold them in quickly and gently. Over-mixing can break the marshmallows or cause them to melt. The goal is to distribute them evenly with just enough contact to coat them lightly in chocolate.
3. Rolling and Shaping for Presentation
The signature slice-and-serve shape depends entirely on a tight, uniform roll.
- Tip: Use the Right Wrap: Aluminum foil or plastic wrap work best for shaping. Lay out a generous sheet, dust it very lightly with powdered sugar (optional, but helps prevent sticking), and spoon the mixture onto it in a log shape.
- Trick: The Tight Roll and Chill Method: After forming the mixture into a rough log, use the wrapping material to tightly compress and roll it into a perfect cylinder. Twist the ends of the wrap like a sausage casing and roll the log back and forth on the counter to eliminate air pockets and achieve a perfect, smooth diameter.
Creative Variations
The beauty of this recipe lies in its adaptability. Once you master the base, you can introduce countless variations to suit any season or preference.
- Seasonal Colors:
- Christmas: Use red and green mini-marshmallows (or tint white marshmallows with food coloring) and add a dash of peppermint extract to the chocolate base.
- Halloween: Use orange, purple, and black mini-marshmallows.
- Pastel Spring: Use pastel-colored marshmallows and white chocolate instead of dark chocolate.
- Flavor Boosts: Introduce a depth of flavor to the chocolate base by stirring in a small amount of extract before adding the marshmallows:
- Almond extract, coffee extract, or orange zest.
- A tablespoon of creamy peanut butter for a peanut butter cup variation.
- Nut and Crunch Alternatives: Replace or supplement the standard walnuts or pecans with:
- Toasted coconut flakes.
- Crushed pretzels for a salty-sweet crunch.
- Cereal pieces (like Rice Krispies) for a lighter texture.
Serving Suggestions and Tricks
While simple, the presentation and serving method can truly elevate the Church Window Cookie experience.
- Serving Trick: Slice When Frozen: The single most important serving tip is to slice the log while it is completely frozen or rock hard. This prevents the cookies from squishing or crumbling and ensures those perfectly crisp "window" edges.
- Presentation: Lay the sliced cookies on a white platter to allow the vibrant colors of the marshmallows to truly stand out.
- Portion Control: Slice the cookies into 1/2-inch thick rounds. This size is perfect for a decadent bite and allows the light through the "windows" effectively.
Proper Storage
Because these are a no-bake confection, their storage requirements are slightly different from traditional baked cookies.
- Initial Stage (Uncut Log): The un-cut log can be tightly wrapped in its foil/plastic and stored in the refrigerator for up to 1 week or in the freezer for up to 2 months. Always double-wrap the log if freezing to prevent freezer burn.
- Humidity Warning: Because of the marshmallow content, these cookies do not do well in warm or high-humidity environments.
Conclusion
The Church Window Cookie is more than just a quick dessert; it is a culinary optical illusion. Its simplicity belies its festive impact, relying on the contrast between the dark, deeply-flavored chocolate base and the bright, chewy marshmallow gems. By focusing on a properly cooled chocolate mixture, gentle incorporation of the "windows," and the crucial step of chilling the log until rock-solid, you guarantee a visually stunning and texturally perfect outcome. With the added flexibility of unique flavor and color variations, these no-bake masterpieces will remain a cherished and fuss-free addition to your dessert repertoire, ready to dazzle guests with their intricate, colorful beauty.
Pin this recipe to share with your friends and followers.