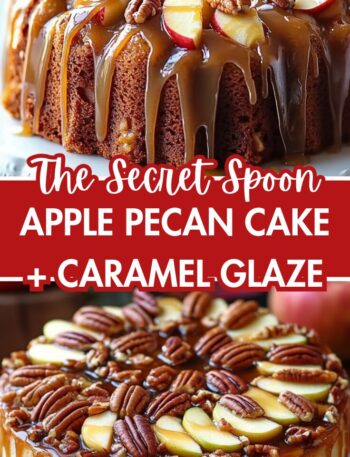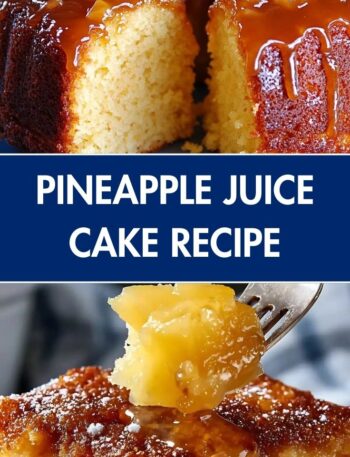
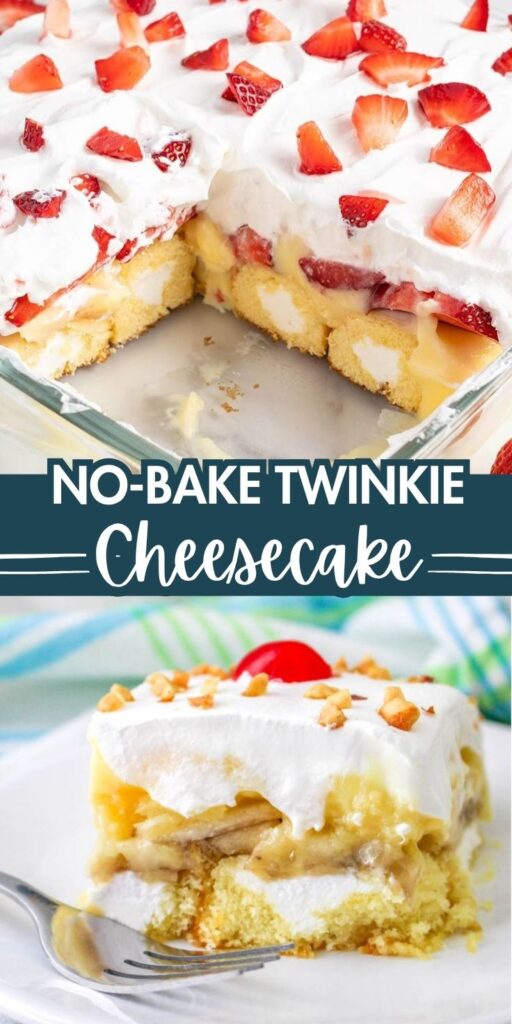

No-Bake Twinkie Cheesecake is a fun, nostalgic dessert that combines the creamy richness of cheesecake with the playful sweetness of Twinkies—all without turning on the oven.
This easy-to-make treat features a base of sliced Twinkies layered beneath a fluffy cheesecake filling, often topped with whipped cream and a drizzle of fruit or chocolate for extra indulgence.
Perfect for parties, potlucks, or a retro-themed gathering, this dessert is as eye-catching as it is delicious. With minimal prep and maximum flavor, No-Bake Twinkie Cheesecake offers a delightful twist on classic flavors that’s sure to impress kids and adults alike.
Looking for a nostalgic dessert that blends creamy, dreamy cheesecake with everyone’s favorite childhood treat? This No-Bake Twinkie Cheesecake is the ultimate indulgence.
With a soft, spongy Twinkie base and a luscious cheesecake topping, it’s easy to make, fun to eat, and always a hit at potlucks, birthday parties, or casual get-togethers. Since it’s no-bake, you don’t even have to turn on your oven!
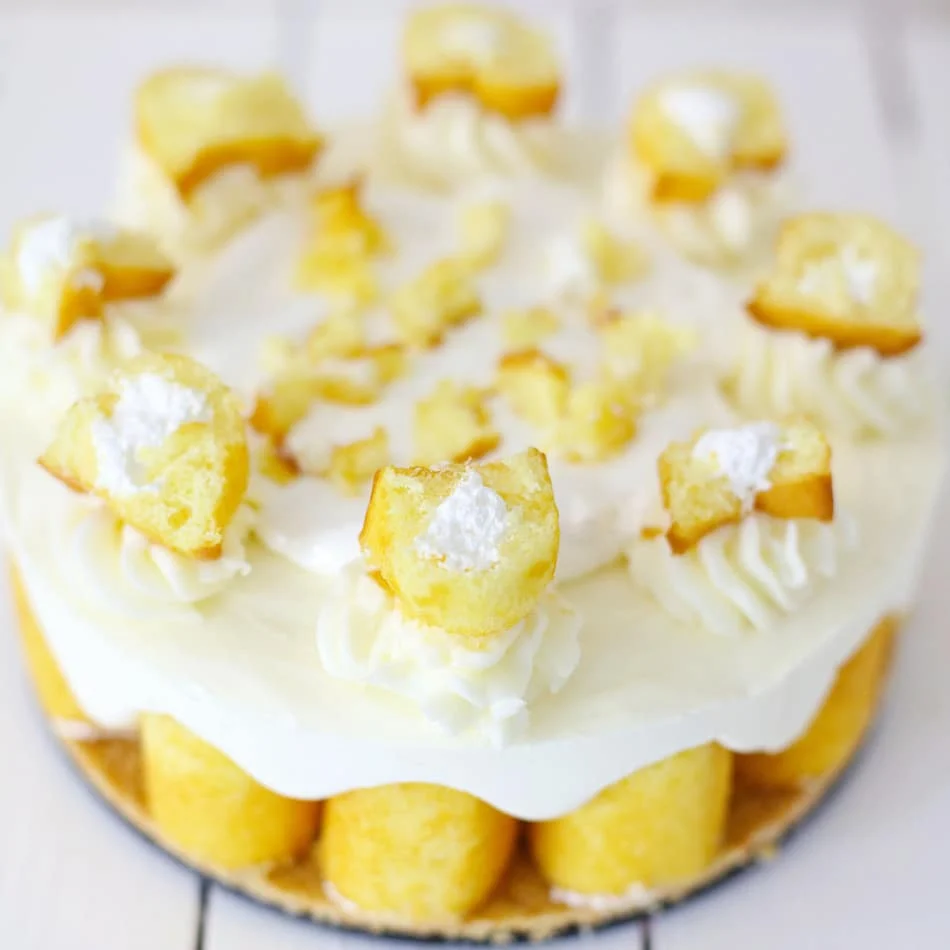
No-Bake Twinkie Cheesecake
Description
No-Bake Twinkie Cheesecake is a fun and nostalgic dessert that combines the creamy richness of cheesecake with the fluffy sweetness of classic Twinkies.
This no-bake treat features a soft Twinkie crust layered with a luscious cream cheese and whipped topping filling, often garnished with fruit or a drizzle of chocolate.
It’s perfect for parties, summer gatherings, or any time you want a quick, crowd-pleasing dessert without turning on the oven.
With minimal prep and maximum flavor, this indulgent treat brings childhood favorites into a delightful new form.
Ingredients
Cheesecake Filling
Topping (Optional but Recommended)
Instructions
-
Prepare the Base
-
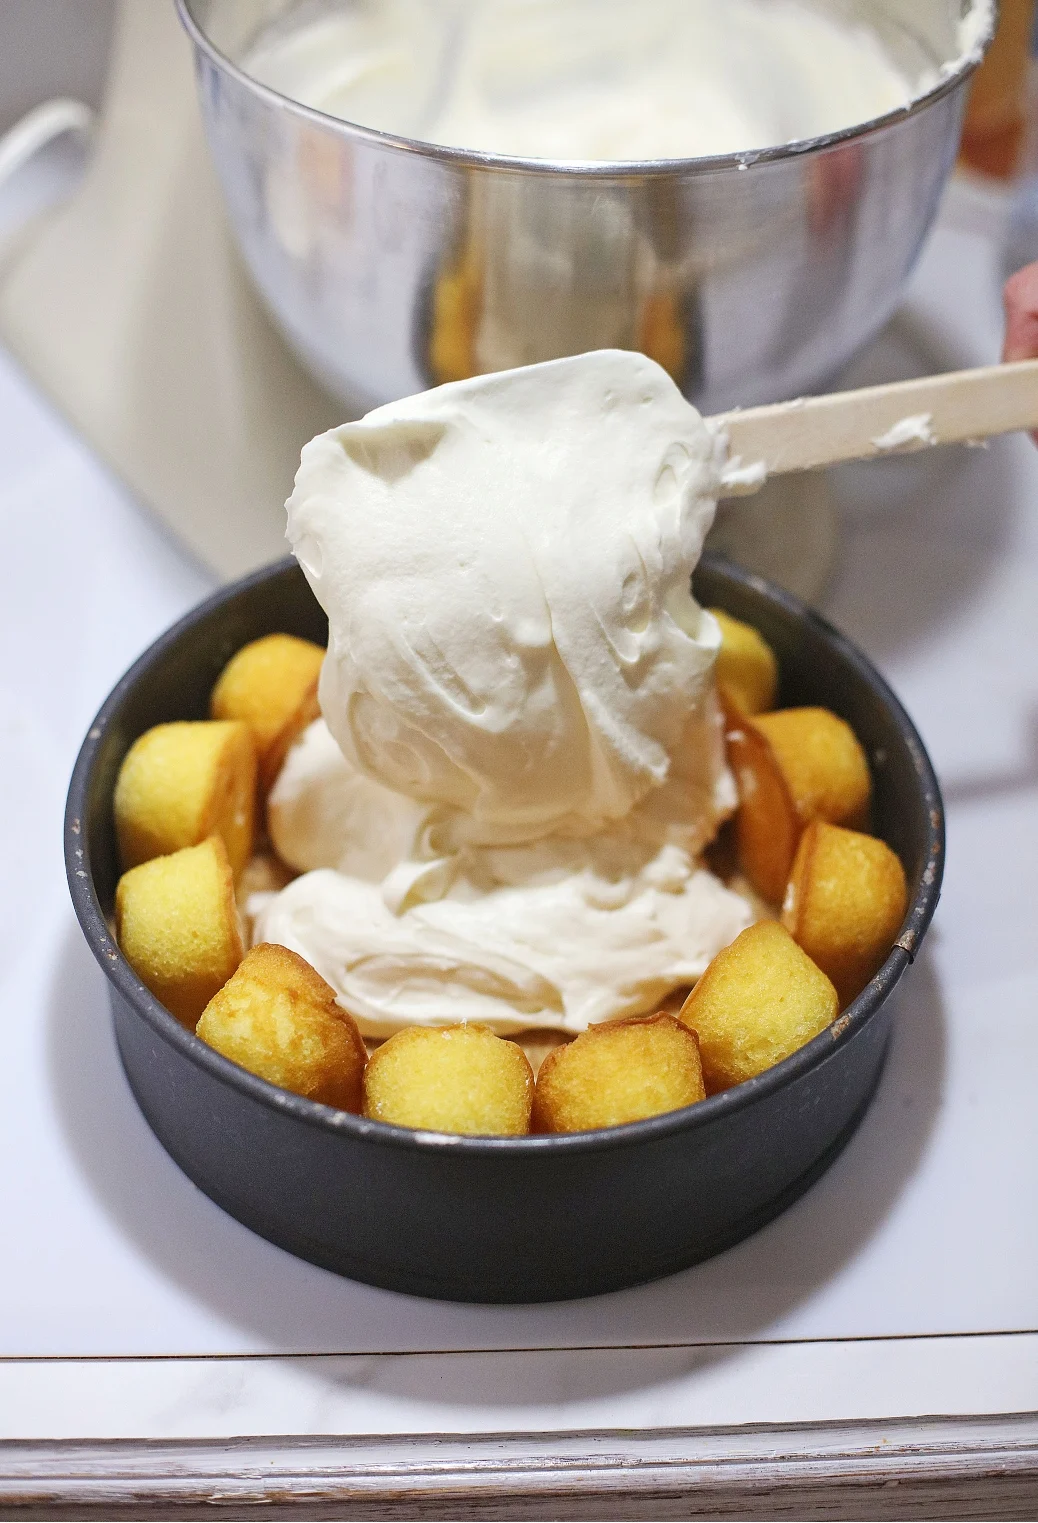
Line the bottom of a greased springform pan with sliced Twinkies (cut lengthwise in half).
-
Press gently to create a single even layer. Optionally, drizzle a bit of melted butter over the Twinkies for added richness.
-
Set aside while you prepare the filling.
-
-
Make the Cheesecake Filling
-
In a large mixing bowl, beat softened cream cheese with granulated sugar until smooth and creamy. Scrape down the sides to avoid lumps.
-
Add vanilla extract and lemon juice. Mix until well combined.
-
In a separate bowl, whip the cold heavy cream with powdered sugar until stiff peaks form (this usually takes 3–5 minutes with an electric mixer).
-
Gently fold the whipped cream into the cream cheese mixture. Do this gradually using a spatula to maintain the fluffy texture.
-
-
Assemble the Cheesecake
-
Spoon the cheesecake mixture over the Twinkie layer.
-
Smooth the top with a spatula, ensuring it reaches all edges.
-
Optionally, sprinkle crushed graham crackers or crushed vanilla wafers on top for added crunch and texture.
-
Cover the pan with plastic wrap or foil.
-
-
Chill
-
Refrigerate the cheesecake for at least 4–6 hours, or overnight for best results.
-
The cheesecake should be firm to the touch before serving.
-
-
Garnish and Serve
-
Before serving, optionally pipe or spread Cool Whip or additional whipped cream around the edges.
-
Add cherries or sliced strawberries for color and a fresh touch.
-
Carefully remove the springform pan ring.
-
Slice and serve chilled. Use a sharp knife dipped in hot water for clean slices.
-
Nutrition Facts
Servings 12
- Amount Per Serving
- Calories 420kcal
- % Daily Value *
- Total Fat 26g40%
- Saturated Fat 16g80%
- Cholesterol 90mg30%
- Sodium 350mg15%
- Total Carbohydrate 45g15%
- Dietary Fiber 0.01g1%
- Sugars 32g
- Protein 5g10%
* Percent Daily Values are based on a 2,000 calorie diet. Your daily value may be higher or lower depending on your calorie needs.
Note
No-Bake Twinkie Cheesecake is a nostalgic, creamy, and fun dessert that brings together the soft, golden sponge of Twinkies with the rich decadence of cheesecake—without ever turning on the oven.
Whether you’re preparing it for a birthday, potluck, or just a weekend treat, here are some smart tips and serving tricks to ensure your dessert is a sweet sensation.
Preparation Tips
- Use Fresh Twinkies
Fresh Twinkies are soft, moist, and easier to slice cleanly. Stale Twinkies can dry out and crumble, affecting both texture and appearance. If using older Twinkies, try microwaving them for 5–10 seconds to revive their softness. - Line the Pan Carefully
For best results, line your springform pan or dish with parchment paper or plastic wrap. This helps with easy removal, especially when working with the sticky Twinkie base. It also prevents sogginess from direct contact with the pan. - Press Firmly
When layering the sliced Twinkies in the base, press them gently but firmly to create an even, gap-free layer. Some recipes suggest cutting Twinkies lengthwise, others into rounds—either way, aim for a snug fit. - Stabilize Your Filling
Since this is a no-bake recipe, stabilizers like whipped topping (Cool Whip) or gelatin are helpful. Gelatin adds structure and prevents a runny consistency. For a vegetarian alternative, agar-agar works well too—just follow the proper bloom and dissolving technique. - Chill Thoroughly
Patience pays off. Let the cheesecake set in the refrigerator for at least 6 hours, preferably overnight. A well-chilled cheesecake slices better and holds its shape during serving. - Add Layers of Flavor
To make it more gourmet, fold in extras like crushed pineapple, chopped strawberries, or a swirl of raspberry jam into the filling. A drizzle of chocolate or caramel sauce between layers also adds visual appeal and richness.
Serving Tricks
- Presentation Matters
A clear glass trifle dish or springform pan shows off the Twinkie layer beautifully. If serving individual portions, try mason jars or small dessert cups—perfect for parties or kids’ events. - Use a Hot Knife
When slicing the cheesecake, dip your knife in hot water and wipe it clean between cuts. This ensures clean edges and professional-looking slices. - Top Creatively
Add whipped cream rosettes, mini Twinkie slices, fresh fruit, or even sprinkles for extra flair. A few crumbs of crushed graham cracker or crushed Twinkie can add texture and a hint of crunch. - Serve Slightly Chilled
Remove the cheesecake from the fridge 10–15 minutes before serving. This slightly softens the filling, enhancing its creamy mouthfeel without letting it get too runny. - Twinkie-Inspired Garnishes
Want to go over-the-top? Garnish with toasted marshmallow fluff, a dusting of powdered sugar, or piped vanilla cream to mimic the Twinkie’s original filling. - Portion Smartly
This dessert is rich, so smaller slices go a long way. A standard 9-inch cheesecake yields about 10–12 satisfying servings. If you're using cups or jars, aim for ½ cup of filling per portion.
lavor Variations
- Chocolate Twist: Use Chocolate Twinkies and drizzle with chocolate syrup on top.
- Berry Swirl: Add swirls of raspberry or strawberry jam into the cheesecake layer before chilling.
- Peanut Butter Dream: Add 1/3 cup peanut butter to the cream cheese mixture and sprinkle chopped Reese’s on top.
Storage Tips
- Refrigerator: Store leftovers in an airtight container for up to 4 days.
- Freezer: You can freeze the cheesecake (without fruit topping) for up to 1 month. Wrap tightly in plastic wrap and foil. Thaw overnight in the fridge before serving.
Helpful Tips
- Room Temp Cream Cheese: This helps prevent lumps in your filling. Cold cream cheese doesn’t mix well.
- Chill Whipping Bowl: For faster whipping, chill your mixing bowl and beaters in the fridge for 10 minutes.
- Twinkie Placement: You can line the sides of the pan vertically with halved Twinkies for a fun presentation.
- Stability: If you want a firmer filling for outdoor events, add 1–2 teaspoons of gelatin (dissolved in water) to the cream cheese mixture.
Bonus Tips
- Make Ahead: No-bake Twinkie cheesecake keeps well for up to 3 days in the fridge, making it perfect for preparing in advance.
- Freezing: You can freeze it for up to a month. Wrap tightly in plastic wrap and foil. Thaw in the refrigerator before serving.
- Flavor Variations: Try using flavored Twinkies like chocolate or banana for a twist, or swap the filling with peanut butter cream cheese for a decadent, salty-sweet spin.
Why You'll Love This Dessert
- No baking required: Perfect for warm days or when you want an easy, no-fuss dessert.
- Kid-friendly: Twinkies are nostalgic and loved by all ages.
- Versatile: Easily customizable with fruits, sauces, or mix-ins.
- Make-ahead: Ideal for parties and gatherings—just prep it the night before.
Conclusion
This No-Bake Twinkie Cheesecake is a delightful fusion of classic snack cake comfort and rich, airy cheesecake elegance. Whether you're hosting a backyard BBQ, a birthday party, or simply indulging in a weeknight treat, this dessert offers a show-stopping presentation with barely any effort. It's no-bake, no-hassle, and all flavor.
Give it a try—you just might find yourself falling in love with Twinkies all over again!
Pin this recipe to share with your friends and followers.
Frequently Asked Questions
What exactly is No-Bake Twinkie Cheesecake?
No-Bake Twinkie Cheesecake is a whimsical dessert that combines classic snack cakes with a creamy cheesecake filling. It typically features a bottom layer of Twinkies (sliced or halved) as the crust, topped with a luscious, whipped no-bake cheesecake layer made from cream cheese, whipped topping (or heavy cream), and sugar. It’s chilled instead of baked, making it incredibly easy to prepare.
Can I make it ahead of time?
Yes! In fact, it's best when made ahead. The cheesecake needs to chill for at least 4 hours—preferably overnight—for the filling to firm up and the flavors to meld. It’s a great make-ahead dessert for parties, potlucks, or family gatherings, and can be stored in the fridge for up to 3–4 days.
What substitutions can I use for Twinkies?
If Twinkies aren’t available, you can substitute them with other cream-filled sponge cakes or ladyfingers. For a twist, try using banana-flavored snack cakes, pound cake slices, or even a graham cracker crust if you prefer less sweetness. Each option provides a slightly different texture but still complements the creamy filling well.
Is this dessert kid-friendly and budget-friendly?
Absolutely. With no baking required and only a handful of ingredients, it’s ideal for beginner cooks or kids helping in the kitchen (with supervision).
Twinkies and basic dairy items are relatively affordable, making this a cost-effective treat. Its nostalgic flavors and playful presentation make it a hit with both kids and adults.