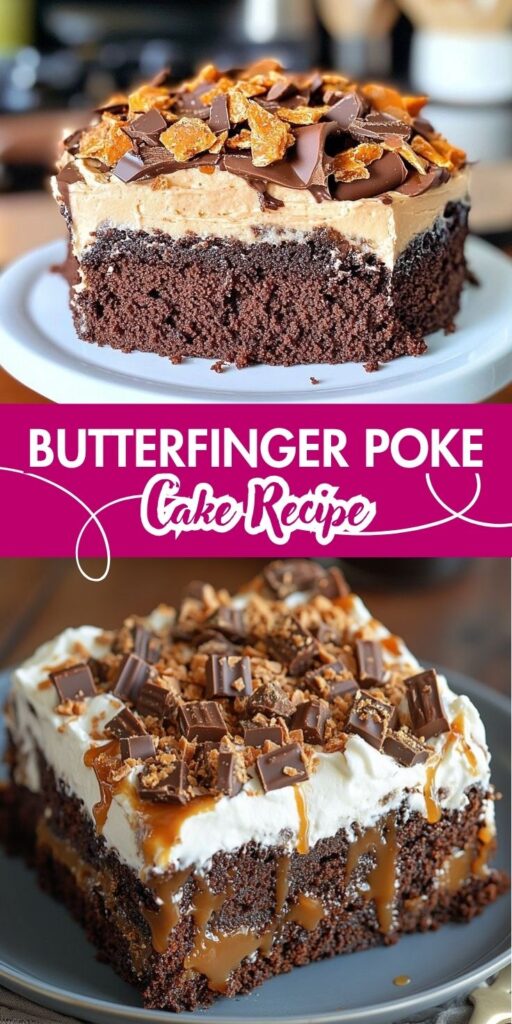

Butterfinger Poke Cake is a rich, indulgent dessert that combines the gooey goodness of a moist chocolate cake with the irresistible crunch of Butterfinger candy bars.
After baking, the cake is “poked” and filled with a luscious caramel sauce, then topped with whipped topping, crushed Butterfingers, and a drizzle of chocolate syrup.
Every bite is a perfect mix of creamy, crunchy, and chocolatey bliss. It’s the ultimate treat for Butterfinger lovers and a guaranteed crowd-pleaser at parties, potlucks, or family gatherings. Easy to make and impossible to resist, this cake takes classic comfort dessert to a whole new level.
If you’re looking for a dessert that combines chocolate, caramel, whipped topping, and crunchy candy in one decadent bite, Butterfinger Poke Cake is your ultimate treat.
Easy to make, fun to serve, and absolutely addictive, this cake is perfect for parties, birthdays, potlucks, or just a cozy weekend dessert.
What Is a Poke Cake?
A poke cake is exactly what it sounds like: a cake that you “poke” holes into after baking so that you can fill it with something delicious—pudding, caramel, fruit purée, or condensed milk.
In the case of Butterfinger poke cake, we go all in with sweetened condensed milk and caramel sauce that soak into a chocolate cake base, topped with fluffy whipped topping and crushed Butterfinger candy.
Butterfinger Poke Cake
Description
Butterfinger Poke Cake is a rich, indulgent dessert that combines the classic charm of a poke cake with the irresistible crunch of Butterfinger candy bars.
Made with a moist chocolate or yellow cake base, it's poked with holes and drenched in sweetened condensed milk or caramel sauce, then topped with whipped topping and crushed Butterfinger pieces.
Every bite offers a gooey, creamy, and crunchy explosion of flavor. It's perfect for parties, potlucks, or any sweet craving.
Ingredients
For the Filling:
For the Topping:
Instructions
-
Bake the Cake
Preheat your oven to 350°F (175°C). Grease a 9x13-inch baking dish.
Prepare the chocolate cake mix according to the package instructions. Pour the batter into the prepared dish and bake as directed (typically 28–32 minutes).
Check for doneness by inserting a toothpick into the center; it should come out clean.
-
Poke the Cake
While the cake is still warm (but not piping hot), use the handle of a wooden spoon or a straw to poke holes all over the surface of the cake, about 1 inch apart. Make sure to go deep enough so the filling can soak in.
-
Pour the Filling
In a bowl, combine sweetened condensed milk and caramel sauce. Stir until smooth. Slowly pour the mixture over the entire cake, making sure it seeps into the holes.
Let the cake cool completely at room temperature, then chill it in the refrigerator for at least 1 hour so the filling sets.
-
Top It Off
Once the cake is fully chilled, spread the whipped topping evenly over the surface. Use a spatula to get a nice, smooth layer.
-
Add the Butterfinger Crunch
Crush the Butterfinger candy bars (you can use a rolling pin and a zip-lock bag), and sprinkle the crushed candy generously over the whipped topping. For extra flair, drizzle more caramel sauce on top if desired.
-
Chill and Serve
Refrigerate the cake for another 30–60 minutes before serving. This makes it easier to cut and helps the flavors meld together.
Slice, serve, and watch it disappear!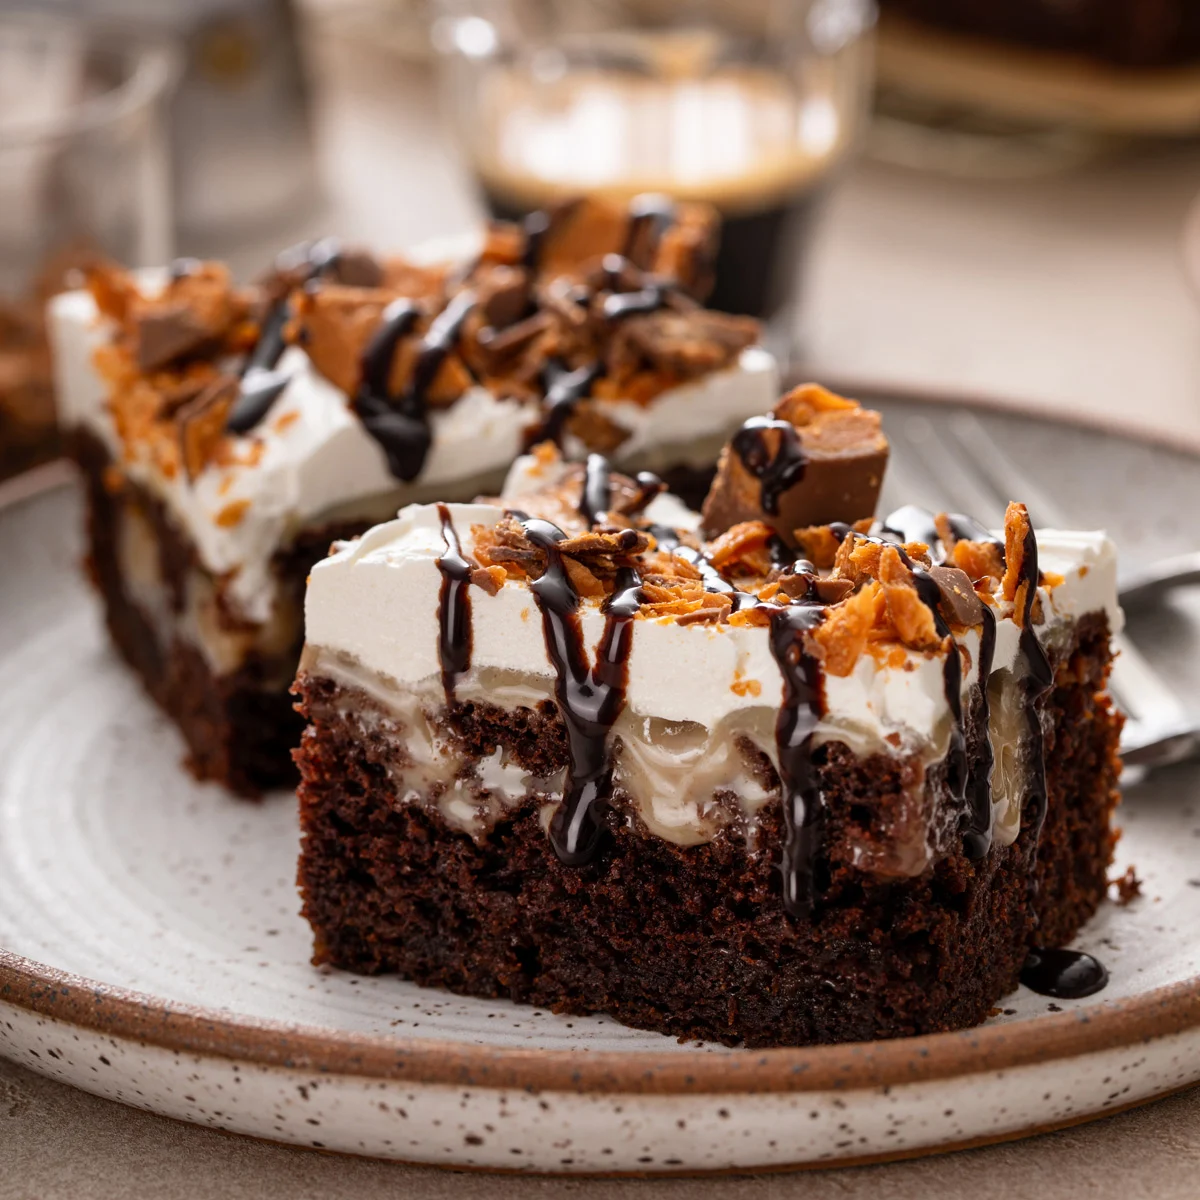
Nutrition Facts
Servings 15
- Amount Per Serving
- Calories 500kcal
- % Daily Value *
- Total Fat 25g39%
- Saturated Fat 12g60%
- Cholesterol 60mg20%
- Sodium 400mg17%
- Total Carbohydrate 60g20%
- Sugars 45g
- Protein 6g12%
* Percent Daily Values are based on a 2,000 calorie diet. Your daily value may be higher or lower depending on your calorie needs.
Note
Butterfinger Poke Cake is a dreamy, rich dessert that combines the moistness of a poke cake with the irresistible crunch and flavor of Butterfinger candy bars.
It’s ideal for birthdays, potlucks, family gatherings, or just when your sweet tooth needs serious satisfaction. Below are all the best tips and serving tricks to make your Butterfinger Poke Cake a total showstopper.
Baking & Poking Tips
- Use a sturdy cake base:
A boxed chocolate cake mix (like Devil’s Food or Chocolate Fudge) works perfectly for Butterfinger Poke Cake. If you want to level it up, substitute milk for water and add an extra egg for a richer, bakery-style cake. - Let the cake cool slightly before poking:
After baking, cool the cake for 10–15 minutes. If you poke too soon, it might tear. Use the handle of a wooden spoon or a straw to make evenly spaced holes across the surface. - Don’t skimp on the poke filling:
The classic filling is sweetened condensed milk and caramel sauce. Pour it slowly and evenly over the cake while it's still warm, letting it seep into every hole for maximum flavor and moisture. - Chill to perfection:
Refrigerate the cake for at least 4 hours (overnight is even better). This helps the filling settle in and creates that gooey, melt-in-your-mouth texture that poke cakes are known for.
Layering & Topping Tips
- Use crushed Butterfingers two ways:
Add one layer of crushed Butterfingers under the whipped topping and another generous sprinkle on top. This gives a nice crunch and intense flavor throughout every bite. - Freeze the Butterfingers before crushing:
Butterfingers can get sticky at room temperature. Pop them in the freezer for 10–15 minutes, then place them in a ziplock bag and crush with a rolling pin. This gives you clean, crunchy bits. - Go big on the topping game:
Instead of plain whipped topping, mix in a few tablespoons of caramel sauce or cream cheese for extra flavor. For a decadent twist, drizzle melted chocolate and caramel sauce over the top before serving. - Add texture and height:
Add chopped peanuts, a swirl of peanut butter, or even chocolate curls on top to create a more visually striking and textured dessert.
Serving Tricks
- Serve cold for best texture:
This cake tastes best when chilled. Serve it straight from the fridge for a dense, creamy bite with that signature Butterfinger crunch. - Cut clean slices:
Use a warm knife to slice through the layers neatly. Run your knife under hot water and wipe clean between slices for sharp, bakery-style cuts. - Make it in advance:
This is a fantastic make-ahead dessert. You can bake and poke the cake one day, add the topping and Butterfingers the next morning, and serve later that day. - Serve in mini cups for parties:
For easy grab-and-go desserts, cut the cake into small squares and place them in clear plastic cups with whipped topping and extra Butterfinger bits. These are perfect for kids' parties or buffet tables. - Pair with coffee or vanilla ice cream:
To balance the sweetness, serve it with a hot cup of coffee or a scoop of vanilla ice cream. The contrast in flavor and temperature makes it even more indulgent.
Tips & Tricks
- Crush the Butterfingers last-minute so they stay crisp. If added too early, they may melt into the whipped topping.
- Want more texture? Add a layer of chopped roasted peanuts or mini chocolate chips on top.
- Make ahead-friendly: You can prepare this cake up to 1–2 days in advance. Just hold off on adding the Butterfinger topping until shortly before serving.
Variations
• Peanut Butter Lover’s Version:
Swirl a few tablespoons of peanut butter into the condensed milk and caramel mixture before pouring it over the cake. You can also add peanut butter chips on top.
• Homemade Whipped Cream Option:
Don’t love store-bought whipped topping? Beat 1½ cups of cold heavy cream with 3 tablespoons of powdered sugar and 1 teaspoon of vanilla extract until stiff peaks form. Use it in place of Cool Whip.
• Cupcake Style:
Instead of a sheet cake, bake the batter into cupcakes. Poke holes using a skewer and follow the same filling and topping method for mini Butterfinger delights.
Storage
- Refrigerator: Store any leftovers in the fridge, covered with plastic wrap or foil. It keeps well for 3–4 days.
- Freezing: You can freeze the cake (without the Butterfinger topping) for up to a month. Thaw in the refrigerator overnight and add fresh topping before serving.
When to Serve It?
Butterfinger Poke Cake is perfect for:
- Birthday parties
- Game nights
- Potlucks
- BBQs
- Holiday tables (especially Halloween if you have leftover candy!)
Its combo of chocolate, caramel, and candy crunch makes it a fan favorite year-round.
Final Thoughts
If you're looking for a dessert that's easy to make yet impressively delicious, Butterfinger Poke Cake checks all the boxes. It's soft, moist, crunchy, sweet, and just a little bit sinful—in the best way possible.
Butterfinger Poke Cake is one of those desserts that looks fancy, tastes incredible, and is shockingly easy to make.
The key is in the layering: moist cake, gooey filling, whipped topping, and that nutty, crispy Butterfinger crunch. With a few smart tricks—like chilling overnight, layering with intention, and freezing the candy—you’ll have a dessert that disappears in minutes.
Whether you're baking for a crowd or just indulging your inner sweet tooth, this cake is guaranteed to be a hit.
Pin this recipe to share with your friends and followers.
Frequently Asked Questions
What is a Butterfinger Poke Cake made of?
A Butterfinger Poke Cake typically starts with a boxed chocolate cake mix (or homemade), which is baked and then “poked” with holes using the end of a spoon.
Sweetened condensed milk and caramel sauce are poured over the top, allowing the flavors to soak into the cake.
It’s then topped with whipped topping (like Cool Whip) and crushed Butterfinger candy bars for that signature crunch and peanut butter flavor.
Do I need to refrigerate the cake?
Yes! This cake is best when chilled. Refrigerating helps the condensed milk and caramel set into the cake, making it moist and rich. It’s recommended to refrigerate it for at least 2 hours, but overnight is even better for deeper flavor and texture.
Can I make it ahead of time?
Absolutely! In fact, making it a day in advance improves the taste as the fillings have time to soak in. Just be sure to add the whipped topping and crushed Butterfinger right before serving to keep them fresh and crunchy.
What variations can I try?
You can customize the Butterfinger Poke Cake in many fun ways! Try using vanilla cake mix for a lighter base, or add peanut butter chips or chocolate pudding into the poke layer. For a richer version, drizzle melted chocolate on top. Want to make it extra special? Add a scoop of ice cream when serving!