Note
No-bake mint cheesecake is a refreshing, creamy, and easy-to-make dessert that’s perfect for any season, especially spring and summer. Its cool mint flavor combined with a rich cream cheese filling and a chocolatey crust makes it a delightful treat. Whether you're serving it at a party or enjoying a cozy dessert at home, here are essential tips and tricks for preparing, perfecting, and serving this delicious cheesecake.
1. Choosing the Right Crust
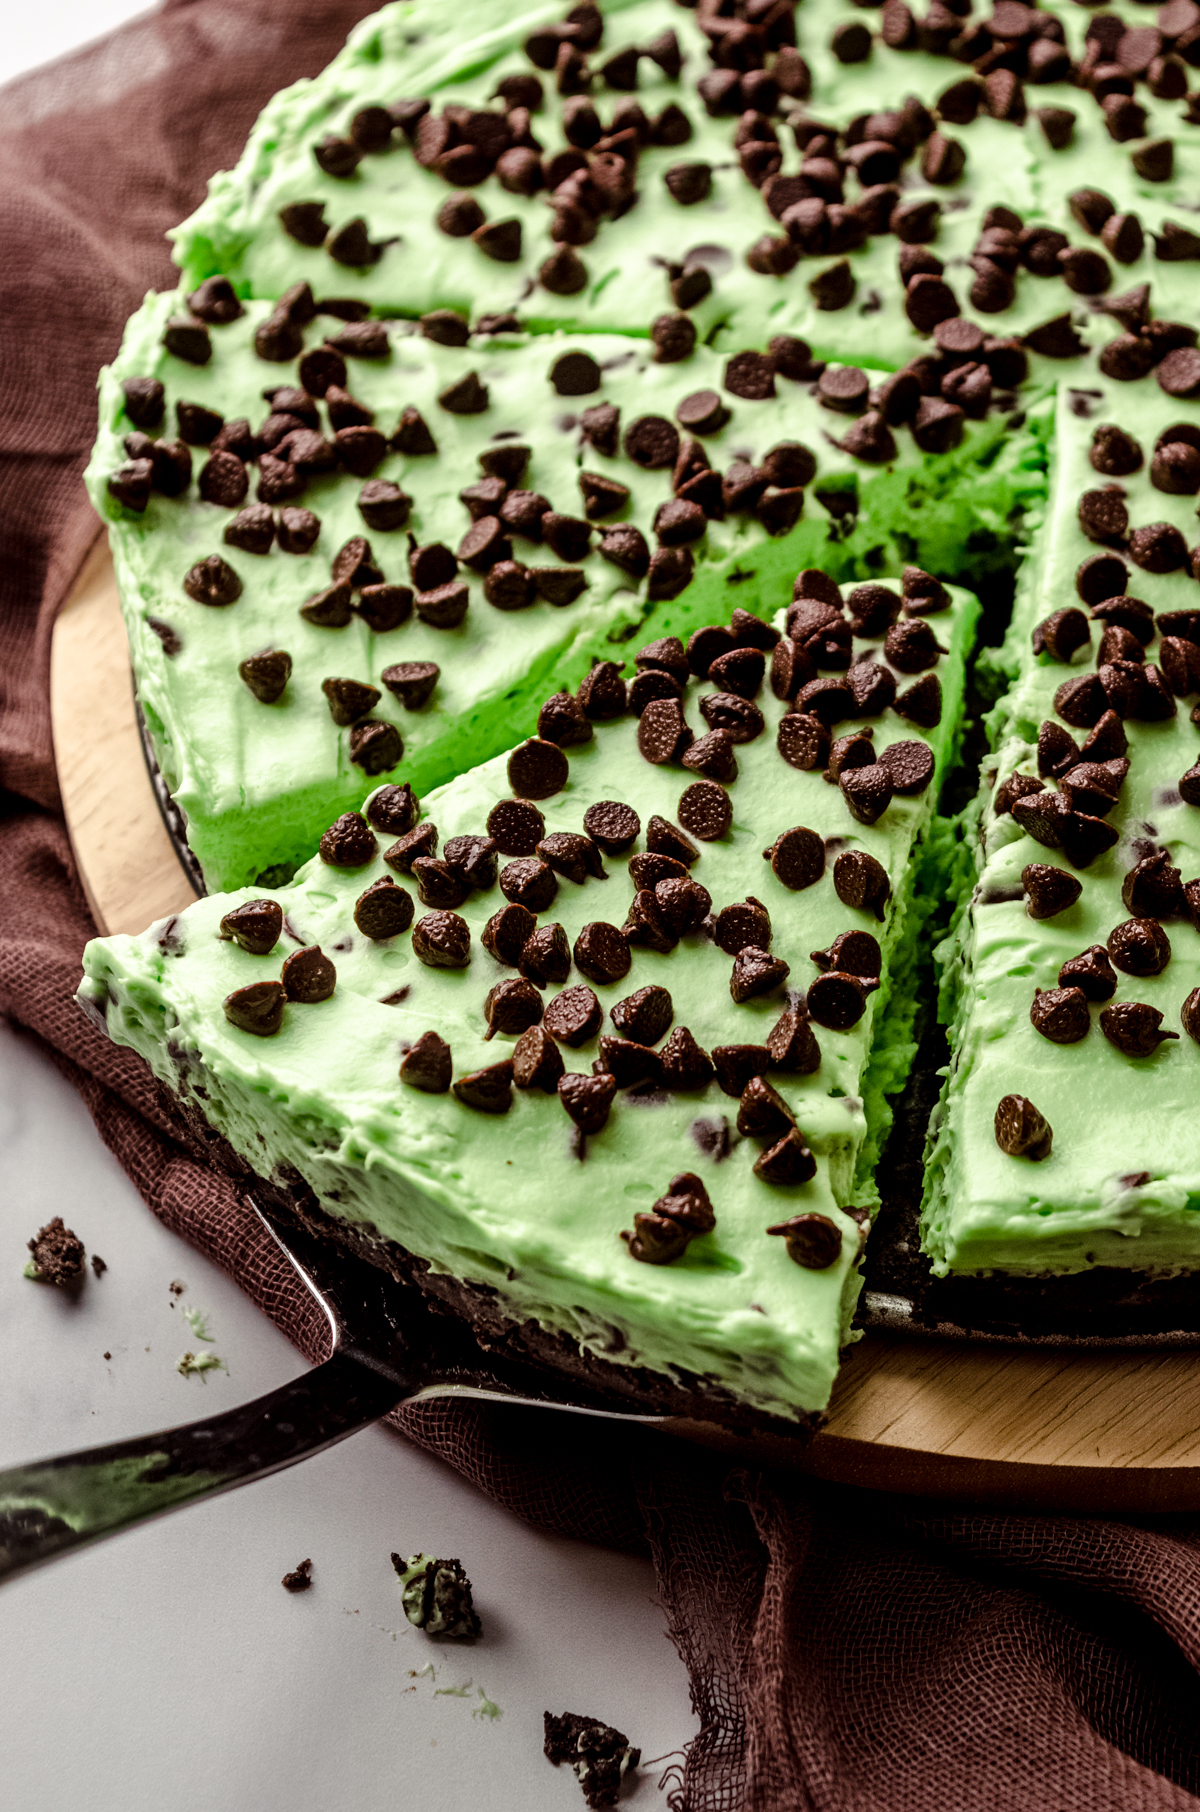
A chocolate cookie crust complements the mint flavor beautifully. You can use chocolate graham crackers, Oreo cookies, or digestive biscuits. Crush the cookies finely and mix them with melted butter (about ¼ cup for every 1½ cups of crumbs) to create a sturdy base. Press the mixture firmly into the bottom of your springform pan or pie dish. Chill the crust for at least 15–30 minutes before adding the filling to ensure it holds its shape.
Tip: Add a pinch of salt or a teaspoon of sugar to enhance the chocolate flavor.
2. Use Quality Cream Cheese and Whipping Cream
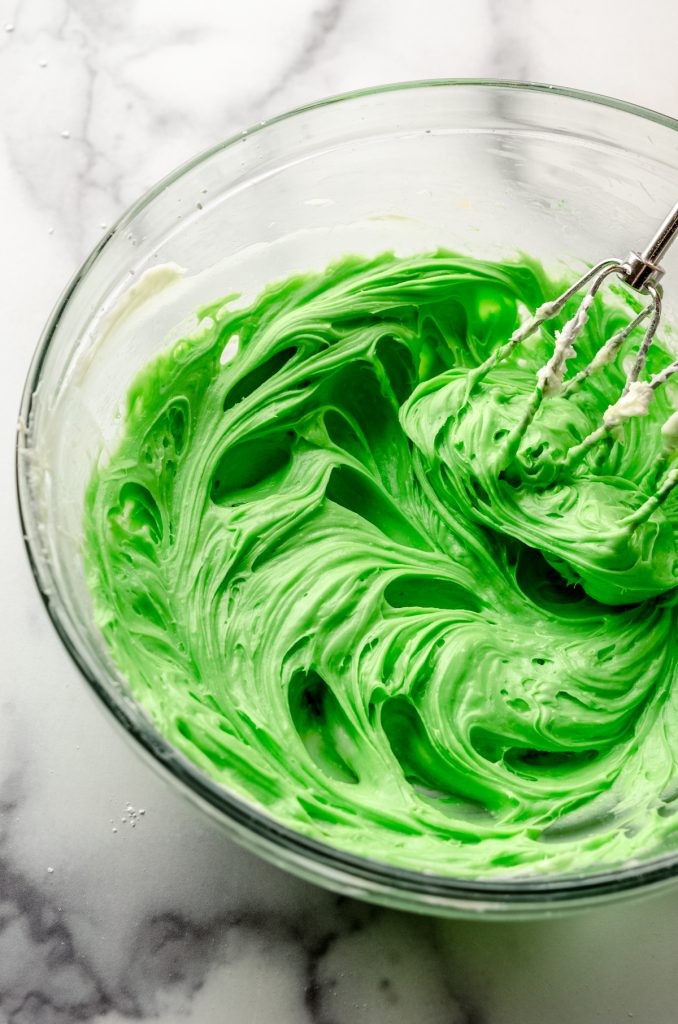
Always use full-fat cream cheese for the best texture and taste. Low-fat versions may result in a runnier or less creamy filling. Let the cream cheese soften at room temperature before beating, ensuring a smooth, lump-free mixture. Combine it with powdered sugar and a splash of pure peppermint extract for the signature minty taste.
Heavy whipping cream should be whipped to stiff peaks before being folded into the cream cheese mixture. This gives the cheesecake its light, airy, mousse-like texture without baking.
Tip: Chill your mixing bowl and beaters before whipping the cream to get better volume.
3. Coloring and Flavor Balance
A drop or two of green gel food coloring enhances the mint appeal visually, but don't overdo it. You want a soft pastel green, not neon! Be cautious with peppermint extract—it’s potent. Start with ½ teaspoon and increase gradually. Too much can turn your cheesecake into toothpaste territory.
For added flavor depth, fold in some mini chocolate chips or a swirl of chocolate fudge sauce.
4. Setting the Cheesecake
Refrigeration is key. Your no-bake mint cheesecake should chill for at least 6 hours, but overnight is best for firm slices and a fully developed flavor. Cover it tightly with plastic wrap or aluminum foil to avoid absorbing fridge odors.
If you're in a hurry, freezing the cheesecake for 1–2 hours before serving can help speed up the setting process—but let it soften slightly at room temperature before slicing.
5. Serving Tricks for Clean, Professional Slices
Use a sharp knife dipped in hot water for cutting clean slices. Wipe the blade clean and re-dip between each cut to maintain tidy edges.
Serving Suggestions:
- Top with whipped cream rosettes and fresh mint leaves for an elegant look.
- Sprinkle crushed chocolate mints (like Andes or peppermint bark) for texture and flavor.
- Add a chocolate ganache layer on top for a decadent twist.
- Serve slices on chilled plates to keep the dessert firm, especially in warm weather.
6. Customizations and Make-Ahead Tips
Want a different take? Try these ideas:
- Mini cheesecakes: Make individual portions using cupcake liners in a muffin tin.
- Crustless option: Pour the filling into dessert glasses or jars for a parfait-style version.
- Vegan option: Use dairy-free cream cheese, coconut cream, and vegan chocolate crust.
No-bake mint cheesecake can be made up to 2–3 days in advance, making it an excellent make-ahead dessert for entertaining. Leftovers will last in the fridge for up to 5 days.
Servings and Portion Tips
This cheesecake typically yields:
- 8 large slices for a 9-inch pan.
- 10–12 smaller slices if serving after a heavy meal.
- 12–15 mini portions if serving at a dessert buffet.
If serving to kids, reduce the peppermint extract slightly, or offer a version with a cookie-and-cream topping instead of strong mint flavors.
Serving and Garnishing
Once the cheesecake is firm and set, carefully remove the springform pan sides. Transfer the cheesecake to a serving platter or keep it on the base if preferred.
To garnish:
- Add whipped cream swirls around the edges using a piping bag.
- Sprinkle chocolate shavings, crushed peppermint candies, or chopped Andes mints on top.
- Decorate with a few fresh mint leaves for a pop of color.
Use a warm knife (dip in hot water and wipe dry) to slice the cheesecake cleanly.
Tips for Success
- Use full-fat cream cheese: For the best texture and flavor, stick to regular full-fat cream cheese. Avoid using low-fat or spreadable versions.
- Don’t skip chilling time: The cheesecake needs at least 6 hours to set properly. Overnight is even better for clean slicing.
- Adjust the mint flavor: Peppermint extract is potent, so start with 1 tsp and taste before adding more. If you prefer a milder mint flavor, reduce the quantity slightly.
- Coloring is optional: Green food coloring gives it that classic minty look, but feel free to skip it if you prefer a more natural appearance.
- Stabilize whipped cream: If you live in a hot climate or need extra firmness, you can use stabilized whipped cream or add a teaspoon of gelatin dissolved in warm water to the cream before folding it in.
Storage Instructions
- Refrigerator: Store the cheesecake covered in the fridge for up to 5 days.
- Freezer: You can freeze slices (or the whole cheesecake) for up to 2 months. Wrap tightly in plastic wrap and foil. Thaw in the refrigerator before serving.
Variations
- Chocolate Mint Cheesecake: Fold mini chocolate chips into the filling for texture and added chocolate flavor.
- Mint Oreo Crust: Use mint-flavored Oreos for extra mintiness in the base.
- Mint Chocolate Ganache Topping: Add a layer of chocolate ganache on top of the cheesecake before chilling for a decadent twist.
Final Thoughts
This No-Bake Mint Cheesecake combines a smooth, creamy texture with the bold freshness of mint and the irresistible crunch of a chocolate cookie crust. It’s easy to make ahead and perfect for warm days or festive gatherings.
A no-bake mint cheesecake is both elegant and easy. By focusing on high-quality ingredients, proper chilling, and thoughtful presentation, you can create a dessert that’s cool, creamy, and perfect for any occasion.
With these expert tips and serving tricks, your mint cheesecake will be a showstopper—no oven required! Its bright flavor and no-fuss preparation make it a favorite for both casual get-togethers and special occasions. Serve chilled, and enjoy every minty, dreamy bite!