Note
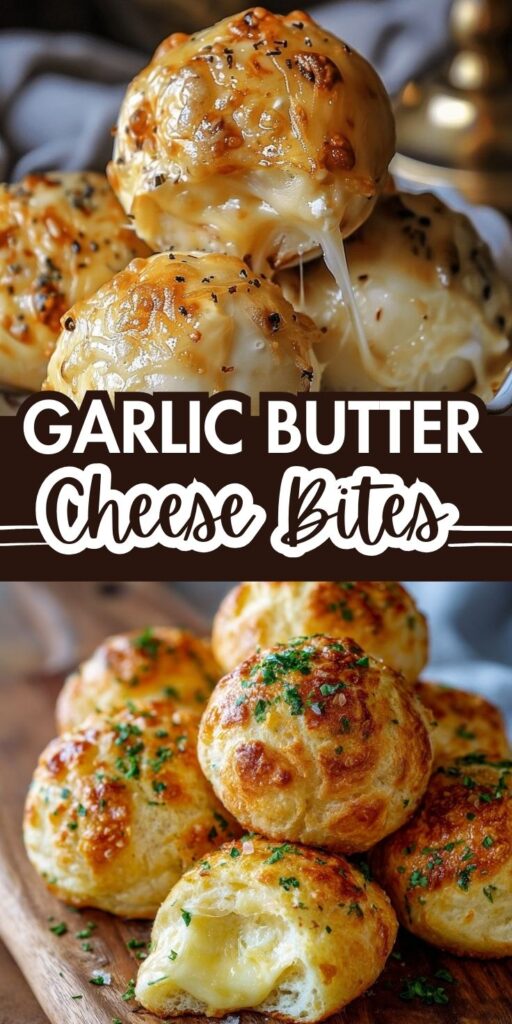
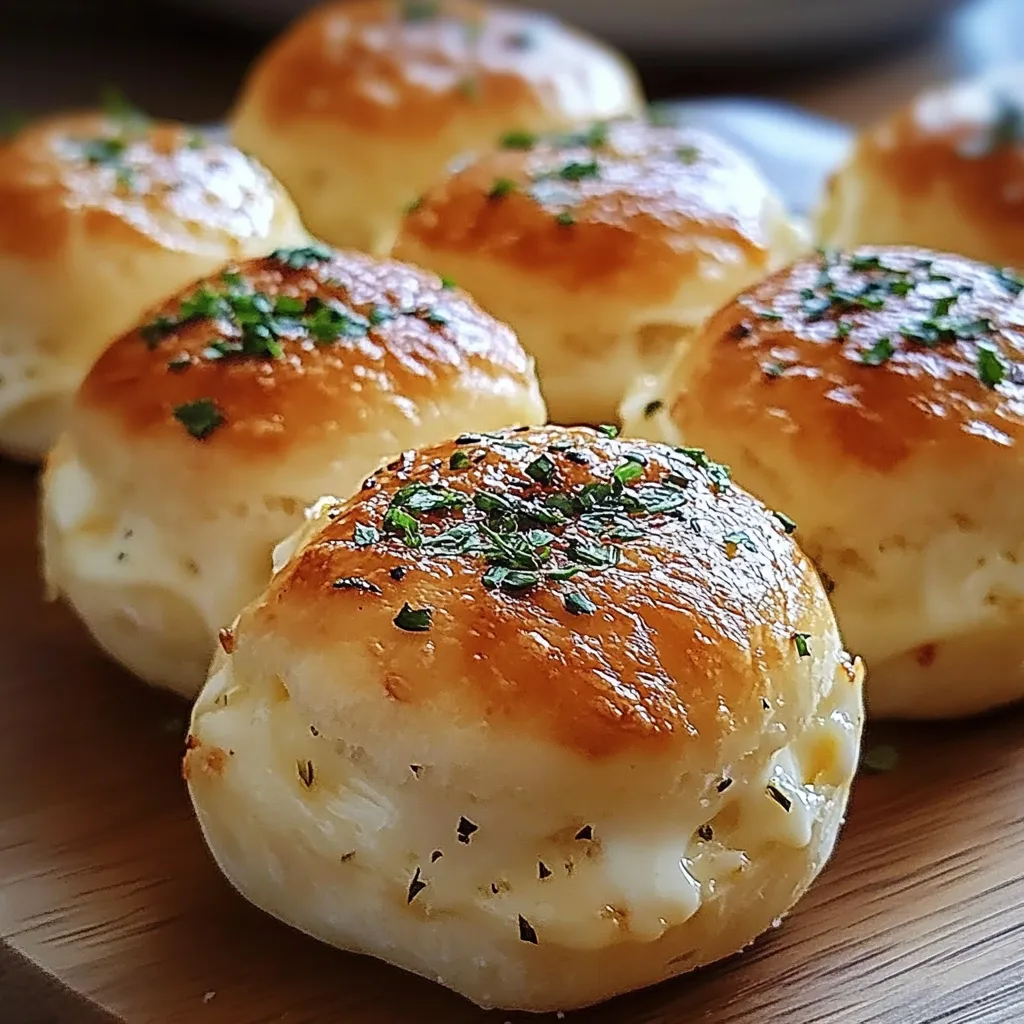
Garlic Butter Cheese Bombs are an irresistible, cheesy, and garlicky snack perfect for parties, family dinners, or just indulging in a cozy treat at home. Soft, fluffy dough encases gooey, melted cheese and is coated in rich garlic butter with a hint of herbs.
Each bite offers a perfect combination of golden, buttery crust and oozing cheese, guaranteed to delight anyone who loves comfort food with a cheesy twist. These bombs are ideal as finger food, served with marinara or ranch dipping sauce.
Garlic Butter Cheese Bombs: Tips, Tricks, and Serving Ideas
Garlic Butter Cheese Bombs are irresistible, golden pockets of gooey cheese wrapped in soft, fluffy dough and coated in a buttery garlic mixture. They’re perfect as appetizers, snacks, or even a side for pasta or soups. Mastering them is simple, but a few tips and tricks will take them from good to truly unforgettable.
1. Choosing the Right Cheese
The heart of every cheese bomb is, of course, the cheese. Mozzarella is a classic choice for its meltiness and stringy texture, but you can combine it with sharp cheddar, pepper jack, or even Gruyère for added flavor. For a richer taste, consider mixing two or three types of cheese. Make sure the cheese is cut into small cubes or shredded so it melts evenly and doesn’t burst through the dough while baking.
2. Perfect Dough
You can use store-bought pizza dough or make your own. If making from scratch, ensure the dough is soft, elastic, and slightly sticky. This will help the bombs puff nicely in the oven and encase the cheese without tearing. Roll the dough into small balls (about 2 inches in diameter) and flatten slightly before adding the cheese. Don’t overfill—too much cheese can cause the bombs to split.
3. Garlic Butter Magic
Garlic butter makes these bombs irresistible. Mix melted butter with minced garlic, a pinch of salt, and optional herbs like parsley or oregano. Brush this mixture generously over the dough balls before baking, and again immediately after they come out of the oven for maximum flavor and shine. For an extra kick, you can sprinkle a little grated Parmesan on top.
4. Sealing the Bombs
Properly sealing your bombs is key to avoid cheese oozing out. After placing the cheese in the center, fold the edges up and pinch tightly. Rolling the sealed ball gently between your palms ensures a smooth, round shape and prevents leaks.
5. Baking Tips
Preheat your oven to 375–400°F (190–200°C) and bake on a parchment-lined baking sheet. Space the bombs about an inch apart so they can expand without sticking together. Bake until golden brown—usually 12–15 minutes. Rotate the baking sheet halfway through for even browning.
6. Serving Ideas
Garlic butter cheese bombs are best served warm, straight from the oven. Pair them with marinara sauce, ranch dressing, or a spicy sriracha dip. They can also accompany soups, salads, or pasta dishes. For parties, arrange them on a platter with toothpicks for easy grabbing.
7. Storage and Reheating
You can prepare cheese bombs ahead of time and freeze them before baking. Bake directly from frozen, adding a few extra minutes to the cooking time. To reheat leftovers, warm them in the oven or air fryer to keep the crust crisp and the cheese melty—microwaving may make them soggy.
8. Variations and Tricks
- Spicy: Add finely chopped jalapeños or a sprinkle of red pepper flakes to the cheese.
- Herby: Mix fresh herbs like basil, thyme, or rosemary into the dough or butter.
- Bacon Lovers: Add crispy bacon bits inside with the cheese for a savory twist.
- Mini Bombs: Make smaller versions for bite-sized snacks—perfect for kids or appetizers.
9. Serving Size
- Standard recipe (using 1 lb of dough and about 2 cups of cheese) yields 12–16 bombs, depending on size.
- Typically, 2–3 bombs per person works as an appetizer.
Tips and Variations:
- Cheese Options: Use pepper jack, gouda, or fontina for different flavors.
- Herbs: Fresh basil or thyme can be added to the filling for extra aromatic flavor.
- Bacon Lovers: Add cooked and crumbled bacon to the cheese mixture for a smoky twist.
- Make Ahead: Assemble the bombs, freeze on a baking sheet, then transfer to a freezer bag. Bake from frozen, adding a few extra minutes to the baking time.
- Spicy Kick: Mix ¼ tsp crushed red pepper flakes into the cheese filling.
Best Season:
- All year round – ideal for game days, parties, winter comfort food, or festive gatherings.
Serving Suggestions:
- Serve in a basket lined with parchment for a rustic look.
- Pair with a cold beer, sparkling cider, or a light salad for a complete snack or appetizer experience.
- For a fun twist, turn them into a pull-apart dish by arranging them in a greased baking dish before baking.
These Garlic Butter Cheese Bombs are irresistible with their golden exterior, buttery garlic aroma, and molten cheesy interior. Perfect for sharing, they’re a guaranteed crowd-pleaser and a fun recipe to make with friends or family.
Summary:
Garlic Butter Cheese Bombs are all about the perfect balance between soft, buttery dough and gooey, flavorful cheese. The key is proper sealing, generous garlic butter, and baking at the right temperature.
Whether you stick to the classic mozzarella version or experiment with herbs, spices, and bacon, these bombs are always a crowd-pleaser. Serve them warm with dipping sauces, and you’ll have guests coming back for seconds.