Note
Peanut Butter Butterfinger cookies are a decadent twist on a classic favorite, combining the creamy, salty goodness of peanut butter with the unmistakable, crunchy, chocolate-coated honeycomb bliss of a Butterfinger candy bar. This guide offers essential tips for baking the perfect batch, innovative serving suggestions, creative variations, and crucial storage advice, ensuring your cookies are a consistently delightful treat.
Tips for Baking the Perfect Cookie
Achieving the ideal texture and flavor in these cookies requires attention to a few key details:
Ingredient Temperature is Key: Ensure both your butter and egg are at room temperature. Cold ingredients can result in a tougher, denser cookie.
The Role of Peanut Butter: Natural, oil-separated peanut butter often requires recipe adjustments due to its thinner consistency. The oils can prevent the cookies from setting properly.
Dough Management: Do not overmix the dough once the flour mixture is added. Overmixing develops the gluten, leading to a chewy, less tender cookie.
The Butterfinger Factor: The candy bar needs to be incorporated correctly. Use a food processor or a heavy-duty zipper bag and a rolling pin to crush the Butterfinger bars into coarse, irregular chunks—not a fine powder. Some larger pieces are desirable as they melt slightly and create pockets of caramel-like crunch. Add these crushed pieces at the very end of mixing, gently folding them in to prevent them from breaking down further.
Baking for Texture: Preheat your oven fully and use parchment paper or a silicone mat. This prevents sticking and ensures even baking. Bake until the edges are golden brown and the centers still look slightly soft. The cookies will continue to set on the baking sheet for a few minutes after removal from the oven, which is essential for that perfect soft-chewy center.
Serving Tricks and Presentation
These rich cookies deserve presentation that matches their flavor.
Elevate the Garnish: While they are perfect plain, a simple garnish adds a professional touch.
The Warm Treat: Serve the cookies slightly warm—about 5 minutes out of the oven—for the ultimate gooey texture. Pair them with a tall, ice-cold glass of milk or a scoop of vanilla bean ice cream for an incredible cookie sandwich.
Cookie Board Dessert: For entertaining, arrange the cookies on a rustic wooden board alongside other complementary treats. Consider pairing them with salted caramel dipping sauce, mini chocolate chip cookies, and small bowls of crushed pretzels and extra chopped Butterfingers for a DIY ice cream sundae/dessert bar.
Coffee Companion: The rich peanut butter and chocolate-caramel notes pair wonderfully with coffee.
Creative Variations
Beyond the standard recipe, these cookies offer numerous opportunities for inventive twists.
The Chocolate Double-Down: Swap out some of the all-purpose flour for cocoa powder (about 1/4 cup) to create a chocolate peanut butter base. The bitterness of the cocoa provides a wonderful counterpoint to the sweetness of the candy bar.
Spicy Peanut Butter: Add 1/2 teaspoon of ground cinnamon and a pinch of cayenne pepper to the dry ingredients for a subtle, warming heat that complements the peanut flavor.
Nutty Crunch Boost: Incorporate 1/2 cup of lightly toasted, coarsely chopped peanuts along with the crushed Butterfingers for an intensified nutty flavor and extra crunch.
Brown Butter Base: Brown the butter before creaming it with the sugars. This process removes water and caramelizes the milk solids, imparting a deep, nutty, toffee-like complexity to the cookie dough that enhances the flavor of the Butterfinger. Cool the browned butter slightly before using.
Giant Pizookie Style: Press the entire dough batch into a greased 9-inch cast iron skillet. Bake until set and serve warm with multiple scoops of ice cream and extra toppings for a shareable "Pizookie" (pizza cookie).
Storage Guidelines
Proper storage is vital to maintain the cookies’ freshness and texture.
Cooling is Mandatory: Always allow the cookies to cool completely on a wire rack before storing them. Storing warm cookies creates condensation, which leads to a soggy texture and can foster mold growth.
Short-Term Storage (Up to 1 Week): To prevent them from becoming too hard or dry, place a half slice of plain white bread in the container with them.
Freezing Baked Cookies (Up to 3 Months): Thaw them at room temperature or warm them gently in the microwave or a low-temperature oven (300∘F) for a fresh-baked taste.
Freezing Dough (Up to 3 Months): This is ideal for quick, fresh-baked treats.
By following these detailed instructions, from precise baking techniques to imaginative serving concepts and smart storage, you will consistently produce Peanut Butter Butterfinger cookies that are irresistible—crisp at the edges, soft in the middle, and bursting with buttery, peanut, and chocolate-caramel flavor.


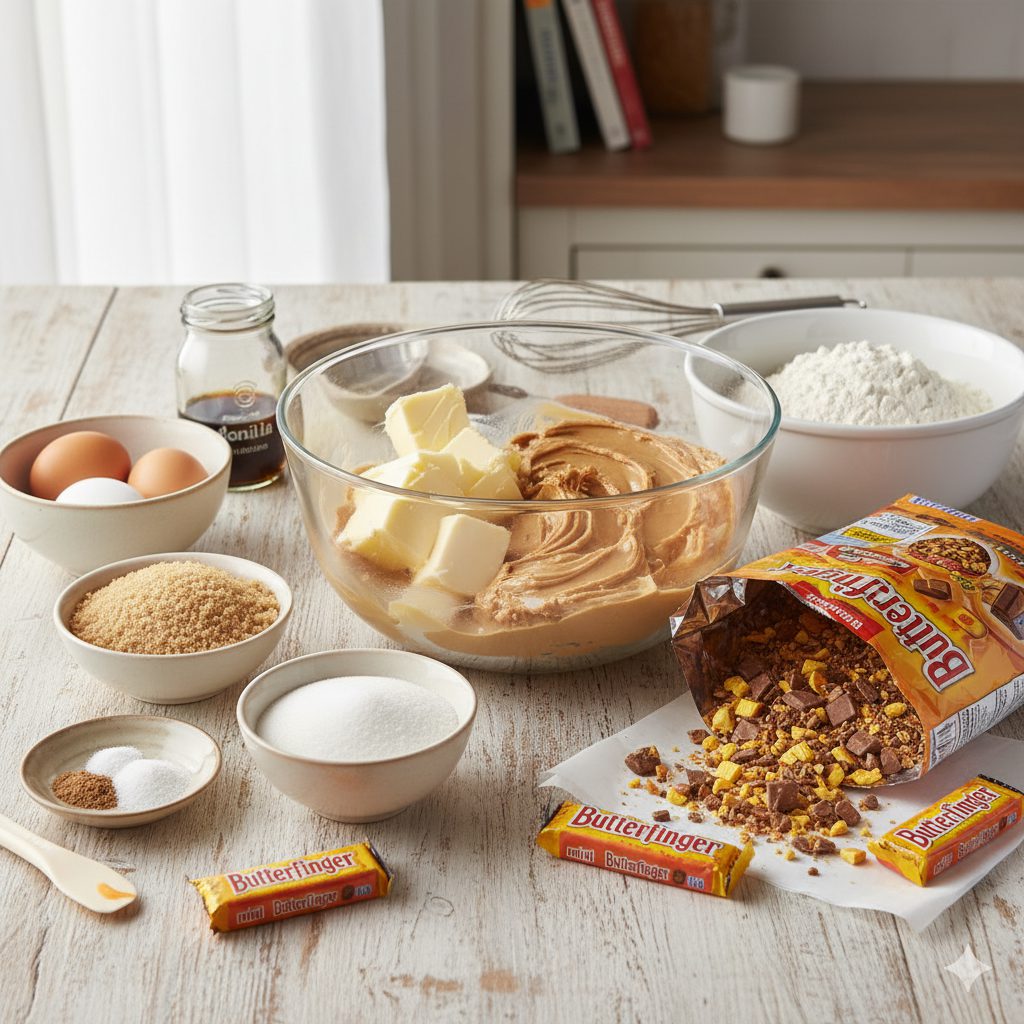 Begin by setting your oven temperature to 350∘ F (175∘C). Prepare your baking surfaces by lining them with baking parchment to facilitate easy removal. In a separate, intermediate bowl, aerate the flour, baking soda, and salt by whisking them together until perfectly uniform.
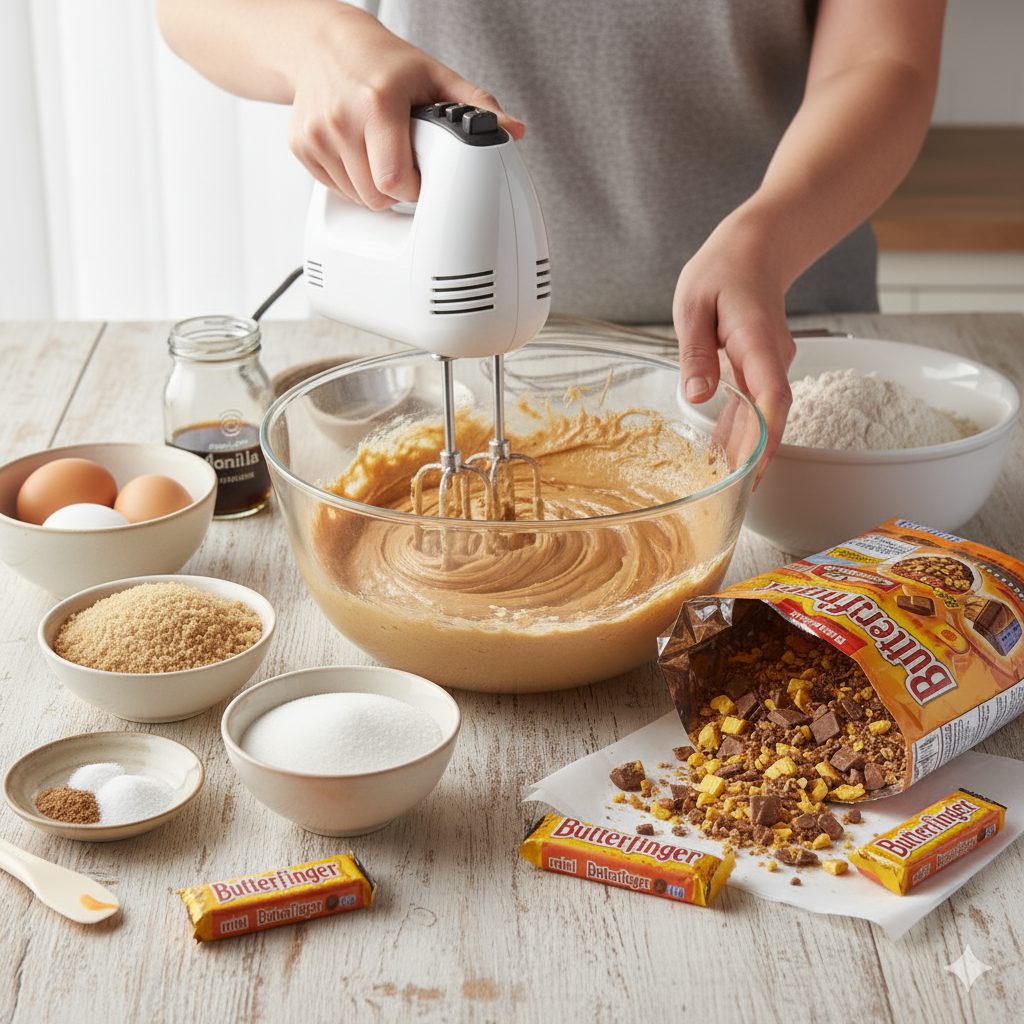 With the mixer running at the lowest setting, gradually integrate the reserved dry flour mix into the liquid components. Mix only until the flour is just absorbed. Cease mixing immediately once all the dry pockets vanish; excessive agitation will toughen the cookie structure.
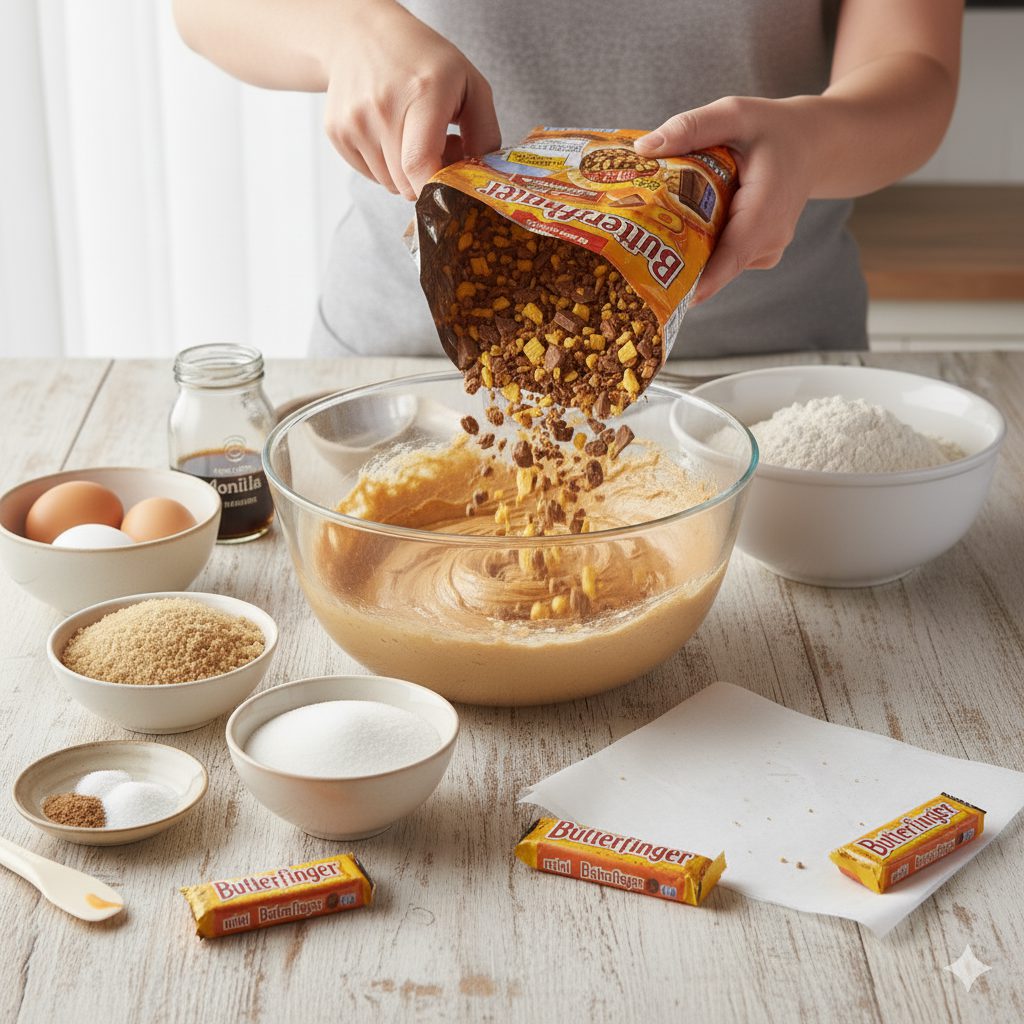 With a wide spatula, gently fold the crushed Butterfinger pieces into the finished dough. Work carefully to disperse the candy evenly so that every cookie bite contains that signature crisp.
 After extracting the baking sheets, permit the cookies to stabilize on the warm tray for several minutes. Once set, very carefully shift them to a cooling grate to finish dropping to room temperature before serving.

